prodigy brake controller instruction manual

Prodigy Brake Controller⁚ Installation Guide

This guide details the Prodigy brake controller installation. Consult the included manual for complete instructions and diagrams. Proper wiring and mounting are crucial for safe operation.

Connecting the Prodigy to Your Tow Vehicle

Begin by locating your vehicle’s 7-way trailer connector. This is typically found near the rear bumper. Ensure the connector is securely attached and free from damage; Next, locate the power wire from your Prodigy controller. This is usually a heavy-gauge wire, often red or marked with a plus sign. Connect this wire securely to the corresponding terminal on the 7-way connector. Consult the wiring diagram in your Prodigy instruction manual for precise color-coding and terminal locations. The manual will also clarify the specific connections for your vehicle’s make and model, to ensure compatibility and proper functioning. Take care to avoid any short circuits when connecting the wires. Double-check all connections before proceeding to the next step. Incorrect wiring can lead to malfunctions or damage to the electrical system of your vehicle.

Wiring the Brake Controller

The Prodigy brake controller wiring process requires careful attention to detail. Refer to the wiring diagram in your manual; it will show the specific wire colors and their corresponding functions. Typically, you’ll connect power, ground, and brake signal wires. The power wire provides electricity to the controller, while the ground wire completes the electrical circuit. The brake signal wire transmits information from your vehicle’s braking system to the controller. Use appropriate connectors and ensure all connections are secure and properly insulated to prevent short circuits. If unsure about any aspect of the wiring process, consult a qualified automotive electrician. Incorrect wiring can lead to malfunctions, damage to your vehicle’s electrical system, or even safety hazards. Always double-check your work before proceeding with the installation.

Mounting the Prodigy Control Unit

Securely mounting the Prodigy control unit is essential for safe and reliable operation. Choose a location within easy reach of the driver, yet out of the way of normal driving activities. The mounting location should provide a stable and level surface. Consult your instruction manual for recommended mounting locations and hardware. Ensure that the mounting surface is strong enough to support the weight of the unit and withstand vibrations. Use the provided mounting hardware to attach the control unit; do not overtighten the screws, as this could damage the unit. After mounting, double-check the unit’s stability. A loose or poorly mounted unit could become dislodged during driving, potentially interfering with the operation of the vehicle or causing a safety hazard. If the mounting surface is not suitable, consider alternative locations or consult a professional installer.

Prodigy Brake Controller⁚ Operation and Features

This section details the Prodigy brake controller’s operation, including its power knob, boost button, and manual override. Mastering these features ensures optimal trailer braking.

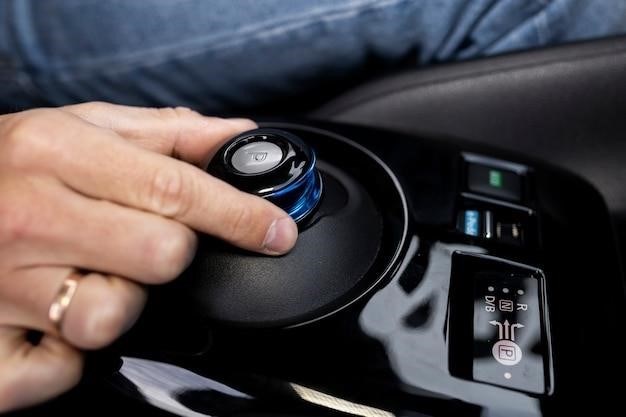
Understanding the Power Knob

The Prodigy brake controller’s power knob is the primary control for setting the braking force. Turning the knob clockwise increases braking power, while counter-clockwise decreases it. Start with a low setting and gradually increase the power until you achieve the desired braking response. Remember to adjust the setting based on the weight of your trailer and road conditions. Heavier loads may require higher power settings, while slippery roads may necessitate lower settings to prevent wheel lockup. The power knob’s functionality is crucial for safe and controlled braking. Always test the braking system in a safe, controlled environment before driving on public roads. Proper adjustment of the power knob is essential for maintaining optimal braking performance and preventing accidents. Never exceed the maximum braking power recommended in the manual.

Utilizing the Boost Button

The Prodigy brake controller’s boost button provides supplemental braking power for demanding situations. Pressing the boost button temporarily increases the braking force beyond the level set by the power knob. This is particularly helpful during emergency stops or when descending steep grades. The added braking power assists in maintaining control and preventing runaway trailers. The boost function is designed for short bursts of increased braking; prolonged use can lead to overheating or other issues. It’s crucial to understand that the boost function supplements, not replaces, the primary braking system. Always maintain a safe following distance and adjust your driving speed to account for the added braking force. Improper use of the boost button can lead to unsafe driving conditions. Refer to your owner’s manual for detailed instructions and safety guidelines.

Manual Override Function

The Prodigy brake controller includes a manual override function, offering direct control over trailer braking independent of the automatic system. This feature is invaluable for precise braking adjustments in challenging situations, such as navigating tight corners or slow-speed maneuvering. By using the manual override, the driver can apply braking force directly to the trailer, bypassing the controller’s automatic response. This allows for greater precision in controlling trailer braking, especially when dealing with varying road conditions or trailer weight. However, remember that the manual override should be used judiciously and only when necessary. Overuse or incorrect application could lead to unsafe braking. Always prioritize safe driving practices and consult the manual for detailed instructions on utilizing the manual override function effectively and safely.

Troubleshooting Common Issues

This section addresses common Prodigy brake controller problems. Consult the manual for detailed troubleshooting steps and solutions for optimal performance.

Intermittent Error Codes

Intermittent error codes on your Tekonsha Prodigy brake controller can be frustrating, but often stem from simple issues. The Prodigy’s display will show a code indicating the problem. Check your connections first—loose wires or faulty plugs are common culprits. Ensure the trailer’s wiring is correctly connected to the tow vehicle’s 7-way connector. A damaged or corroded connector can interrupt the signal, leading to erratic behavior. Inspect the controller’s internal wiring for any signs of damage or wear. If the problem persists after checking these, you might need to consult the detailed troubleshooting section of your Prodigy instruction manual or contact Tekonsha support for further assistance. They can provide guidance on more advanced diagnostic steps or potential controller issues. Remember to always disconnect the controller’s power before inspecting or working on any wiring. Following the instructions in the manual will ensure safe and efficient troubleshooting.

Poor Braking Performance

Experiencing poor braking performance with your Tekonsha Prodigy brake controller? Several factors could be at play. First, verify the controller’s gain setting is appropriately adjusted for your trailer’s weight and load. Insufficient gain might result in weak braking, while excessive gain could cause jerky or overly aggressive braking. Check your trailer brakes themselves—worn brake pads or shoes will significantly reduce braking effectiveness. Inspect the trailer’s wiring harness for any breaks, shorts, or corrosion, as these can severely impact braking power. Ensure the trailer’s brake lights are functioning correctly; the Prodigy uses brake light signals for optimal braking performance. If the trailer is equipped with electric-over-hydraulic brakes, inspect the hydraulic system for any leaks or malfunctions. If the problem persists despite these checks, it might indicate a problem with the controller itself. Consult the Prodigy’s manual for advanced troubleshooting steps or contact Tekonsha support for further assistance.

No Trailer Recognition

If your Tekonsha Prodigy brake controller isn’t recognizing your trailer, systematically check several key areas. Begin by confirming that the trailer is correctly connected to your tow vehicle’s seven-way connector. Inspect all wiring connections for proper seating and the absence of any corrosion or damage. A faulty 7-way connector on either the vehicle or trailer can prevent communication. Ensure the trailer’s brake lights function correctly; the Prodigy relies on this signal to detect a connected trailer. Test the trailer’s brake lights independently to verify their operational status. If the lights aren’t working, address any wiring issues before attempting further troubleshooting. Verify that the trailer’s brakes are properly wired and grounded. A poor ground connection can disrupt communication between the controller and trailer brakes. If all connections and lights are functioning, the Prodigy itself might require attention. Consult the Prodigy’s instruction manual for advanced troubleshooting steps or contact Tekonsha support for expert assistance.

Advanced Prodigy Features

Explore advanced features like proportional braking, trailer brake holding, and electric over hydraulic braking options for enhanced control and safety.

Proportional Braking System

The Prodigy’s proportional braking system is a key safety feature. Unlike older systems with simple on/off braking, the Prodigy uses a sophisticated sensor to detect deceleration. This sensor constantly monitors the rate at which your tow vehicle slows down. Based on this deceleration rate, the Prodigy automatically adjusts the braking force applied to your trailer. This ensures smooth, controlled braking in various situations, preventing jerky stops and minimizing the risk of sway or jackknifing. The system’s responsiveness adapts to different road conditions and towing loads, offering consistent braking performance. This intelligent system significantly enhances safety and control, especially during emergency stops or when navigating challenging terrain.

Trailer Brake Holding Feature

The Prodigy brake controller incorporates a convenient trailer brake holding feature designed to enhance safety and convenience, particularly on inclines. With this feature activated, the controller maintains a consistent braking force on your trailer even when your tow vehicle is stationary. This prevents the trailer from rolling backward on hills, significantly improving stability and preventing potential accidents. The holding function automatically engages after a short period of brake pedal application while stopped. To disengage, simply release the brake pedal. This feature is particularly beneficial when parked on slopes or during temporary stops on inclines, offering an added layer of security and ease of use. Refer to your manual for specific activation and deactivation procedures.

Electric vs. Electric-Over-Hydraulic Braking

The Tekonsha Prodigy brake controller offers compatibility with both electric and electric-over-hydraulic (EOH) braking systems. Electric braking utilizes electric actuators directly on the trailer axles. EOH systems employ a hydraulic actuator controlled by an electric signal. Understanding the distinction is vital for proper setup and optimal braking performance. Electric systems are generally simpler and less expensive, while EOH systems offer potentially stronger braking power and better control, particularly for heavier trailers. The Prodigy controller automatically adapts to the type of braking system installed on your trailer, simplifying the setup process. However, ensure your trailer’s braking system matches the selected setting on the controller to guarantee safe and effective braking. Consult the controller’s manual and your trailer’s documentation for more details.

Maintaining Your Prodigy

Regularly inspect wiring, connections, and the control unit itself. Clean as needed and promptly address any issues. Contact Tekonsha support for assistance or component replacement.

Regular Inspection and Cleaning

Regular maintenance of your Tekonsha Prodigy brake controller is essential for optimal performance and safety. Begin by visually inspecting all wiring and connections, checking for any signs of damage, such as fraying, corrosion, or loose connections. Pay close attention to the connections at both the vehicle and trailer ends, ensuring a secure and tight fit. Loose connections can lead to intermittent braking or complete failure. Inspect the Prodigy control unit itself for any physical damage or signs of wear and tear. A damaged unit could compromise its functionality. Periodically clean the unit with a soft cloth and a mild detergent solution, removing any dirt or debris that could accumulate over time. Avoid using harsh chemicals or abrasive cleaners, as these could damage the unit’s surface or internal components. Regular cleaning helps to maintain the unit’s appearance and ensures its smooth operation. Remember to always disconnect the controller from the power source before performing any cleaning or maintenance procedures. This precaution safeguards against electrical hazards and prevents accidental damage. Following these simple steps will significantly extend the lifespan of your Prodigy brake controller.

Replacing Components

Replacing components in your Tekonsha Prodigy brake controller might become necessary due to wear, damage, or malfunction. Before attempting any component replacement, always disconnect the controller from the vehicle’s power supply to prevent electrical hazards. Refer to the detailed diagrams and instructions within your Prodigy brake controller manual to identify the specific component requiring replacement. Ensure you acquire the correct replacement part from an authorized dealer or Tekonsha directly to maintain the controller’s functionality and warranty. When replacing components, carefully follow the steps outlined in the manual, ensuring proper connection and alignment of each part. Improper installation could lead to malfunctions or damage to other controller components. After replacing a component, reconnect the controller to the vehicle’s power supply and test its functionality to verify the successful completion of the replacement. If you encounter difficulties during the replacement process, or if you are unsure about any step, contact Tekonsha’s customer support for assistance. Their expertise can prevent potential problems and ensure the safe and effective repair of your brake controller.

Contacting Tekonsha Support

If you encounter difficulties installing, operating, or troubleshooting your Tekonsha Prodigy brake controller, accessing Tekonsha’s support resources is recommended. Their website, www.tekonsha.com, offers a comprehensive FAQ section, downloadable manuals, and troubleshooting guides. You can find answers to frequently asked questions and solutions to common problems. If you require direct assistance, Tekonsha provides various contact options. You can call their customer support hotline, the number for which is usually found on their website or in your controller’s manual. They are available during business hours to answer your questions and provide technical support. Additionally, Tekonsha may offer email support. Check their website for their contact email address. Clearly describe your issue, including the controller model, any error codes displayed, and the steps you’ve already taken to troubleshoot. Providing detailed information helps Tekonsha’s support team quickly diagnose the problem and offer effective solutions. Remember to keep your Prodigy brake controller’s model number and serial number handy when contacting support, which can expedite the resolution process.

comhoma recliner chair assembly instructions

This manual provides step-by-step instructions for assembling your Comhoma recliner chair. It includes detailed illustrations and clear descriptions to guide you through the process. Please read these instructions carefully before beginning assembly. You may find helpful videos on Comhoma’s website or YouTube.

Introduction

Welcome to the world of Comhoma recliners! Your new chair is designed to provide unparalleled comfort and relaxation. Whether you’re looking to unwind after a long day, enjoy a movie night, or simply find a comfortable spot to read, your Comhoma recliner is the perfect solution. This manual is designed to guide you through the assembly process, ensuring a smooth and enjoyable experience. We’ve included detailed instructions, clear illustrations, and helpful tips to make the process as straightforward as possible. Before you begin, please ensure you have a clean, flat surface and adequate space to work. We recommend having an assistant to help with certain steps, as some components may be heavy. Take your time, follow the instructions carefully, and enjoy the rewarding experience of assembling your new Comhoma recliner.

Unboxing and Preparation

Before you begin assembling your Comhoma recliner chair, take some time to carefully unpack the box. Locate the assembly manual, which is typically included in a separate pouch or envelope. This manual will contain detailed instructions and diagrams for assembling your chair. Set aside the assembly manual for easy access during the assembly process. Carefully remove all packing materials, such as foam, plastic bags, and cardboard. Make sure to dispose of these materials responsibly. Place all of the chair parts on a clean, flat surface. This will make it easier to identify each part and ensure you have all the necessary components. Check the parts list in the assembly manual to verify that you have all the required components. You might want to take inventory of the hardware, including screws, bolts, washers, and nuts, to ensure you have all the necessary fasteners. With all the parts laid out, carefully review the assembly manual to get a general understanding of the steps involved. This will help you familiarize yourself with the process and make assembly smoother.

Assembly Steps

The assembly process for your Comhoma recliner chair typically involves several steps, each with specific instructions. These steps will be outlined in your assembly manual. It is important to follow these instructions carefully to ensure proper assembly and functionality of your chair. Each step should be completed in the order listed in the manual. The manual will likely include illustrations and diagrams to guide you through each step. Take your time and carefully review each step before proceeding. Be sure to use the correct tools for each step. The assembly manual will indicate the necessary tools for each step. If you are unsure about any step or tool, consult the manual or contact Comhoma customer support for assistance.

Step 1⁚ Assembling the Base

The base of your Comhoma recliner chair is typically the foundation upon which the rest of the chair is built. The assembly of the base often involves connecting several pieces, such as the legs, footrest frame, and base frame. The assembly manual will provide detailed instructions on how to connect these parts. Make sure to align the holes in the pieces correctly before inserting the bolts or screws. Use the appropriate wrench or screwdriver to tighten the fasteners securely. The manual will specify the torque required for each fastener. Once the base is assembled, it should be stable and sturdy. You may need to test the stability of the base before proceeding to the next step. If you encounter any difficulties or notice any instability, refer to the manual or contact Comhoma customer support for assistance.

Step 2⁚ Attaching the Backrest

The backrest is a crucial part of the recliner chair, providing support and comfort. The assembly manual will guide you on how to attach the backrest to the base. Often, this involves aligning the backrest with the base frame and securing it with bolts or screws. Ensure that the backrest is properly aligned and that the holes in the backrest and base frame match. Use the appropriate tools to tighten the fasteners securely. The manual will specify the required torque for each fastener. Before tightening the fasteners, ensure that the backrest is positioned at the correct angle and height. Once the backrest is attached, check its stability and ensure that it is securely connected to the base. If you encounter any difficulties or notice any instability, refer to the manual or contact Comhoma customer support for assistance.

Step 3⁚ Connecting the Seat

The seat is the primary component of the recliner chair, providing the foundation for comfortable seating. The assembly process will involve attaching the seat to the base and backrest. Refer to the assembly manual for specific instructions on how to connect the seat. Often, this involves aligning the seat with the base frame and backrest, ensuring that the holes in all components align. Use the appropriate tools to secure the seat with bolts or screws. Tighten the fasteners securely, adhering to the specified torque values in the manual. Before tightening the fasteners, double-check that the seat is positioned correctly, ensuring a smooth and even fit. Once the seat is connected, inspect it for stability and ensure it is firmly attached to the base and backrest. If you encounter any problems or notice any instability, consult the manual or contact Comhoma customer support for assistance.

Step 4⁚ Installing the Footrest

The footrest is a crucial element of the recliner chair, extending from the base and offering a comfortable resting position for your feet. It often features a mechanism for adjusting the angle, allowing you to customize its position for ultimate comfort. The assembly process may involve attaching the footrest to the base frame or connecting it to a linkage mechanism that allows for its extension and retraction. Use the provided screws or bolts to secure the footrest to the designated points on the base frame. Ensure that the footrest is securely fastened, preventing any movement or looseness. Refer to the assembly manual for specific instructions on how to connect the footrest and to identify the correct fastening points. Once the footrest is installed, test its functionality by extending and retracting it. Ensure that it moves smoothly and locks securely in place. If you experience any issues with the footrest mechanism, consult the assembly manual or contact Comhoma customer support for assistance.

Step 5⁚ Attaching the Headrest

The headrest is designed to provide additional support and comfort for your head and neck while reclining. It is typically attached to the backrest of the recliner, allowing for adjustable height and angle. Comhoma recliner chairs may feature a variety of headrest designs, including padded headrests, adjustable headrests, and even headrests with built-in massage features. To attach the headrest, locate the designated attachment points on the backrest. These could be pre-drilled holes or slots for inserting the headrest support rods. Align the headrest with the attachment points and carefully secure it using the provided screws or bolts; Ensure that the headrest is firmly fastened and that the screws or bolts are tightened appropriately. Once the headrest is installed, check for any looseness or instability. Adjust the headrest’s height and angle to find the most comfortable position for your head and neck. If the headrest is adjustable, follow the provided instructions to understand the mechanism for adjusting its position. If you encounter any difficulties attaching the headrest or adjusting its position, refer to the assembly manual or contact Comhoma customer support for assistance.

Adjusting and Testing

After assembling your Comhoma recliner chair, it’s crucial to adjust and test it to ensure it’s functioning correctly and comfortably. First, familiarize yourself with the various adjustment mechanisms. Comhoma recliners often feature multiple adjustments, including reclining, rocking, massage, heating, and swiveling functions. Carefully read the instructions provided in the assembly manual to understand how to operate each adjustment mechanism; Start by reclining the chair to your preferred position. Make sure the reclining mechanism operates smoothly and locks securely in place. Test the rocking function, if applicable, and ensure it provides a comfortable and controlled motion. Experiment with the massage settings, if available, and adjust the intensity and type of massage to your liking. Check the heating function, if applicable, and make sure it heats up to a comfortable temperature. If your chair has a swivel function, test it to ensure it rotates smoothly and stably. Once you’ve adjusted all the features to your liking, take a few minutes to relax in your new recliner and enjoy its comfort. Pay attention to any areas of discomfort or instability, and make further adjustments as needed. If you encounter any issues or have questions about adjusting the chair, refer to the assembly manual or contact Comhoma customer support for assistance.

Troubleshooting

While assembling and using your Comhoma recliner chair, you may encounter some minor issues that can be easily resolved. Here are some common troubleshooting tips⁚

  • If your chair doesn’t recline smoothly, check if any screws are loose. Tighten them if necessary. Also, make sure the reclining mechanism is free of any obstructions.
  • If the massage function doesn’t work properly, check if the power cord is securely connected. Ensure the remote control is working and has fresh batteries. If the issue persists, consult the assembly manual or contact Comhoma customer support.

  • If the heating function doesn’t work, check if the power cord is connected correctly. Ensure the heating control is turned on and set to the desired temperature.
  • If the swivel function is not working, check if the base is securely attached to the chair. Make sure there are no obstructions preventing the base from rotating freely.
  • If you experience any other issues, refer to the assembly manual or contact Comhoma customer support for assistance.

Remember to always disconnect the power cord before troubleshooting any electrical components.

Maintenance and Care

Proper maintenance is essential to ensure your Comhoma recliner chair remains in excellent condition and provides lasting comfort. Follow these simple steps to keep your chair clean and functional⁚

  • Regular Cleaning⁚ Dust and vacuum your chair regularly to remove dirt and debris. For upholstery, use a soft brush attachment for the vacuum or a slightly damp cloth. Avoid using harsh chemicals or abrasive cleaners as they can damage the fabric.
  • Spot Cleaning⁚ For spills or stains, blot the area immediately with a clean, damp cloth. Avoid rubbing or scrubbing as this can spread the stain. If necessary, consult the cleaning instructions for your specific chair material.
  • Leather Care⁚ If your chair has leather upholstery, use a leather conditioner regularly to keep it soft and supple. Avoid using harsh cleaners or polishers that can damage the leather.
  • Mechanism Care⁚ Lubricate the reclining mechanism, footrest, and swivel base periodically with a light silicone spray or oil. This will help ensure smooth operation and prevent squeaking.
  • Avoid Overloading⁚ Do not exceed the weight capacity of your chair to prevent damage to the frame and mechanisms.
  • Store Properly⁚ If you need to store your chair for extended periods, cover it with a dust cover to protect it from dirt and dust. Avoid storing it in direct sunlight or humid environments.

By following these simple maintenance tips, you can extend the life of your Comhoma recliner chair and enjoy its comfort for years to come.

Safety Precautions

Your safety is our priority. Please read and follow these safety precautions carefully before and during the use of your Comhoma recliner chair.

  • Assembly⁚ Always assemble the chair on a flat, stable surface. Follow the instructions carefully and use the appropriate tools; Ensure that all screws and bolts are securely tightened. At least two adults are required to safely assemble this recliner chair.
  • Weight Limit⁚ Do not exceed the weight limit specified for your chair. Overloading can damage the frame and mechanisms.
  • Reclining⁚ Always use the reclining mechanism slowly and carefully. Avoid sudden movements that could cause injury. Do not stand up when the footrest is extended.
  • Children and Pets⁚ Keep children and pets away from the chair when it is in use. The reclining mechanism and footrest can pose hazards to small children and pets.
  • Electrical Components⁚ If your chair has electrical components such as a massage function or heat, follow the instructions carefully. Do not use the chair if any wires or electrical connections are damaged.
  • Power Cord⁚ If your chair uses a power cord, make sure it is plugged into a properly grounded outlet. Keep the cord away from heat sources and sharp objects.
  • Maintenance⁚ Regularly inspect the chair for any signs of wear or damage. Do not use the chair if any parts are broken or damaged.

By following these safety precautions, you can help ensure a safe and enjoyable experience with your Comhoma recliner chair.

Congratulations! You have successfully assembled your Comhoma recliner chair. With a little care and attention, your new recliner will provide you with years of comfort and relaxation; Remember to follow the instructions carefully and prioritize safety during assembly and use.

We encourage you to take advantage of the many features of your Comhoma recliner chair. The reclining, rocking, massage, and heated features can help you achieve ultimate comfort and relaxation. The swiveling capabilities allow for easy movement and access to your surroundings. We believe that your Comhoma recliner chair will enhance your enjoyment of your home.

If you have any questions or encounter any issues during assembly or use, please refer to the assembly manual included in the packaging or visit the Comhoma website for additional information. You can also contact customer support for assistance.

Enjoy your Comhoma recliner chair!

how much to tip raft guide

How Much to Tip a Raft Guide

Tipping your raft guide is a great way to show appreciation for their service and dedication to your safety, but how much should you tip your raft guide? The amount you tip is really up to you․ Raft guiding is considered a service industry and many people believe anyone in the service industry, like restaurants, hotel employees, and hairdressers, should get between 10 to 20 of the total cost of the service․

Factors to Consider

Several factors can influence how much you tip your raft guide; It’s not just about the length of the trip, but also about the overall experience and the effort your guide put in․ Here are some key things to consider⁚

  • Guide Expertise⁚ Was your guide skilled and knowledgeable? Did they handle the rapids with expertise and ensure the safety of everyone on board? A more experienced and skilled guide might warrant a higher tip․
  • Trip Difficulty⁚ Was the rafting trip on challenging rapids or more leisurely? Guides on challenging trips deserve extra recognition for their skills and attention to safety․
  • Trip Length⁚ A longer trip, especially an overnight or multi-day trip, involves more time and effort from the guide․ Consider tipping accordingly for their dedication and service․
  • Special Requests⁚ Did you have any special requests or needs? If your guide went above and beyond to accommodate your requests, a larger tip is appreciated․
  • Overall Experience⁚ Did you have a memorable and enjoyable experience? Was the guide friendly, enthusiastic, and informative? A tip reflects your satisfaction with the entire trip․

Ultimately, the amount you tip is your decision․ Consider these factors, and tip generously if you feel your guide provided excellent service․

Standard Tipping Practices

While there’s no set rule for tipping raft guides, a common practice is to tip between 10% and 20% of the total trip cost; This range is similar to tipping in other service industries, such as restaurants or hotels․ However, the specific amount can vary depending on factors like the length of the trip, the difficulty of the rapids, and the level of service provided․

Some companies, like Grand Canyon Whitewater, recommend a specific tipping percentage, which can be a good starting point for determining your tip․ For instance, they suggest tipping 8 to 10 percent of the full trip price for a job well done․

It’s also acceptable to tip on a per-person basis․ For shorter trips, you might tip $5 to $10 per person, while for longer trips, you might tip $10 to $20 per person․ Ultimately, the amount you tip is a personal decision based on your satisfaction with the guide’s service and the overall experience․

Tipping Based on Trip Length

The duration of your rafting trip can influence the tipping amount․ Shorter trips, such as half-day or day trips, typically warrant lower tips compared to multi-day excursions․ For a half-day trip, a tip of $3 to $5 per person is generally considered appropriate․ For a full-day trip, the tip range increases to $5 to $7 per person․

Multi-day trips, which involve overnight stays and potentially more challenging rapids, often require a higher tip․ A common tip range for a two-day trip is $10 to $15 per person․ It’s important to remember that these are just general guidelines, and the specific tip amount can vary based on individual preferences and the level of service provided․

If you’re unsure about the appropriate tip amount for your specific trip, you can always ask the rafting company for their recommendations․ They will likely have guidelines or suggestions based on their experience and the typical tipping practices in their region․

Tipping Based on Trip Difficulty

The difficulty of the rapids you encounter on your rafting trip can also factor into the tipping amount․ More challenging rapids require greater skill and experience from your guide, who must navigate the river safely and efficiently while keeping your group comfortable and informed․ For trips involving mild or intermediate rapids, a gratuity of $5 to $10 per person for a short or partial day trip is usually appropriate․

However, for full-day trips or excursions with very challenging rapids, the tip amount might increase to $5 to $20 per person․ Your guide’s expertise and ability to handle difficult situations, ensuring the safety and enjoyment of your group, are crucial factors in determining the tip amount․ Remember that tipping is a way to express your appreciation for your guide’s efforts and dedication, and a higher tip for a more demanding trip is a testament to their skills and the overall success of your experience․

Tipping for Overnight Trips

Overnight rafting trips involve a greater commitment from both the guides and the guests․ The guides are responsible for providing not only navigation and safety but also camping, cooking, and ensuring everyone’s comfort throughout the multi-day journey․ A larger tip is generally expected for overnight trips, reflecting the extended time and effort involved․

You can choose to tip the guides individually, or you can give a single tip to the trip leader, who will then distribute it evenly among the guides․ The accepted service industry standard for overnight trips is between 10% and 20% of the total trip cost․ However, the amount you choose to tip is ultimately up to you, based on your satisfaction with the guide’s service and the overall experience․ Your guides will appreciate any gesture of gratitude for their hard work and dedication to ensuring a memorable and enjoyable trip for you․

Tipping for Exceptional Service

While a standard tip is appreciated, exceptional service deserves an extra show of gratitude․ If your guide went above and beyond to ensure your safety, comfort, and enjoyment, consider a higher tip to reflect their dedication․ This could include exceeding expectations in their knowledge of the river and surrounding area, providing engaging stories and insights, or going the extra mile to accommodate your individual needs and preferences․

For truly outstanding service, a tip of 50% to 100% of the standard tip amount can be a meaningful way to express your appreciation․ This demonstrates your recognition of their exceptional performance and encourages them to continue providing top-notch service to future guests․ Ultimately, the amount you choose to tip for exceptional service is a personal decision based on your experience and the level of service you received․

Tipping During Holidays

During holiday periods, such as Thanksgiving, Christmas, or New Year’s, consider increasing your tip to show extra appreciation for your guide’s efforts․ These times are often busier for rafting companies, meaning guides may be working longer hours and dealing with larger crowds․ A higher tip can acknowledge the extra effort they put in to ensure a positive experience for everyone․

A tip of 20% or more of the standard amount is a common practice during holidays․ This demonstrates your understanding of the increased workload and your appreciation for the guide’s dedication to providing exceptional service․ While tipping is always optional, a generous tip during holiday periods can show your gratitude and make the experience more rewarding for your guide․

Cash or Check?

The most common and preferred method of tipping your raft guide is with cash․ This is because it’s the easiest for the guides to divvy up amongst themselves, especially if there are multiple guides on the trip․ If you’re not comfortable carrying a large amount of cash, you can always write a check․ However, it’s a good idea to leave the check blank until the end of the trip and ask the trip leader who you should make it out to․

The trip leader may have you make the check out to themselves or to another guide, depending on how they handle tip distribution․ While some companies may accept credit cards for tips, it’s best to check with your rafting company beforehand to see what their preferred method is․ Ultimately, the most important thing is to show your appreciation for the guide’s hard work and dedication to your safety․

Alternatives to Tipping

While tipping is a common practice in the rafting industry, there are alternative ways to show your appreciation for your guide’s service․ If you’re not comfortable with the traditional tipping system, you can always offer a small gift instead․ This could be something like a bottle of wine, a gift card to a local restaurant, or even a handwritten thank-you note․

Another option is to leave a positive review online․ Sharing your positive experience with others can help the guide’s business and show your gratitude for their efforts․ Ultimately, the best way to express your appreciation is to find a method that feels genuine and comfortable for you․ Whether you tip, offer a gift, or leave a review, your guide will appreciate your recognition of their hard work․

The Importance of Tipping

Tipping your raft guide is not just a gesture of gratitude, but also a way to acknowledge the hard work and expertise they bring to the adventure․ Raft guides are more than just boat operators; they are skilled professionals who ensure the safety and enjoyment of their guests․ They are responsible for navigating challenging rapids, providing detailed information about the river and surrounding environment, and ensuring the comfort and well-being of everyone on board․

Their dedication to safety and their passion for the sport often extends beyond the official trip hours․ They may spend extra time preparing for the trip, setting up equipment, and cleaning up afterwards․ By tipping your guide, you are recognizing the value of their skills and commitment․ In a sense, you are rewarding them for going the extra mile to make your experience memorable and enjoyable․

Ultimately, the decision of how much to tip your raft guide is entirely up to you․ While there are general guidelines and common practices, it’s important to consider the quality of service, the duration and difficulty of the trip, and your own budget․ A tip is a way to show your appreciation for a job well done and to support the dedicated professionals who make whitewater rafting adventures possible․ Whether you choose to tip a percentage of the trip cost, a per-person amount, or something in between, your generosity will be appreciated by your guide and will contribute to their livelihood․

Remember, tipping is not an obligation, but a gesture of gratitude․ It’s a way to acknowledge the hard work, dedication, and expertise that your guide brings to the experience․ By tipping fairly, you can help ensure that these skilled professionals continue to provide safe and memorable adventures for years to come․

lexus is250 manual gearbox

Lexus IS250 Manual Gearbox⁚ An Overview

The Lexus IS250’s manual transmission, a rare find, is the Aisin RA6. Known for its smooth shifts, it’s praised for its refined feel but criticized for occasional synchromesh issues and rev hang. Its relatively light weight contributes to decent fuel economy, while its relatively short gear ratios offer spirited performance. Despite its drawbacks, enthusiasts appreciate its unique character in an otherwise automatic-dominated segment.

Rarity and Collectibility

The Lexus IS250 manual transmission is a highly sought-after rarity among automotive enthusiasts. Production numbers for the manual variant were significantly lower compared to its automatic counterpart, making finding a used example a challenging task. This limited production run, coupled with the growing appreciation for driver-focused vehicles and manual transmissions in general, has contributed to the increasing collectibility of the IS250 manual. Online forums and car communities frequently discuss the difficulties in sourcing these vehicles, highlighting their scarcity. The combination of a luxury brand, a relatively sporty model, and the increasingly rare manual gearbox makes the IS250 manual a desirable collectible for automotive enthusiasts and investors alike, further bolstering its value in the used car market. The unique driving experience offered by the manual transmission, combined with the overall reliability of the Lexus brand, contributes to its growing appeal as a sought-after classic.

The Aisin RA6 Transmission⁚ Strengths and Weaknesses

The Lexus IS250 manual utilizes the Aisin RA6 six-speed gearbox, a transmission known for its smooth and precise shifting action under normal driving conditions. Many owners praise its refined feel, a characteristic often associated with higher-end vehicles. However, some common criticisms revolve around potential synchromesh issues, particularly during quicker shifts or under duress. Reports suggest that these issues may manifest as difficulty engaging certain gears, especially at higher RPMs or when cold. Additionally, the presence of rev hang, a phenomenon where engine revs linger after releasing the throttle, has been noted by some drivers. While not exclusive to the IS250 manual, it’s a characteristic that detracts from the overall driving experience for some. Despite these potential drawbacks, many owners find the overall driving experience rewarding, appreciating the direct connection and control offered by a manual transmission in a relatively sporty sedan. The Aisin RA6, while not perfect, offers a balance of refinement and engagement, typical of its era.

Fuel Efficiency and Performance

The fuel efficiency of the Lexus IS250 manual transmission, while generally good for its class and engine size, is a topic of some debate among owners. While the lighter weight of the manual transmission compared to its automatic counterpart might suggest better fuel economy, real-world results vary. Driving style plays a significant role, as aggressive driving habits will inevitably lead to lower MPG figures. Some owners report achieving impressive fuel economy figures, particularly on highway driving, while others find the difference compared to the automatic version to be negligible. In terms of performance, the short gear ratios of the manual transmission provide a more engaging driving experience, allowing the driver to fully utilize the 2.5L V6 engine’s power band. This leads to quicker acceleration from standstill and a more responsive feel compared to the automatic, especially in lower gears. However, this improved responsiveness may come at the cost of slightly reduced overall fuel economy compared to more relaxed driving styles in the automatic version.

Driving Experience and Handling

The Lexus IS250 manual offers a unique driving experience, praised for its smooth yet engaging feel. The short throws and precise shifting action contribute to an enjoyable driving experience, though some find the clutch action less refined than expected.

Shift Feel and Gear Ratios

The shift feel in the Lexus IS250 manual transmission is a frequently discussed topic among owners and enthusiasts. Many describe the shifts as smooth, precise, and relatively short-throw, contributing to an engaging driving experience. However, some have reported occasional notchy shifts, particularly at higher mileage, suggesting potential synchromesh wear. This is a common issue with many manual transmissions, especially with age and use. The gear ratios themselves are generally considered well-suited to the car’s performance characteristics. First gear provides strong acceleration off the line, while the higher gears allow for comfortable cruising at highway speeds. The relatively close ratios between gears aid in maintaining momentum during spirited driving. While the overall consensus is positive regarding the smooth nature of the gearbox, the potential for synchromesh wear should be considered when evaluating the long-term reliability of this particular transmission. Individual experiences may vary, and regular maintenance is crucial to maintain optimal shifting performance. The precise characteristics of the shift feel might also be affected by factors such as driving style and the overall condition of the vehicle.

Clutch Engagement and Pedal Feel

The clutch engagement and pedal feel in the Lexus IS250 manual transmission are points of both praise and criticism. Many drivers appreciate the relatively light clutch pedal effort, making city driving less tiring. The engagement point is described by some as precise and predictable, allowing for smooth starts and shifts. Others, however, find the engagement to be somewhat abrupt or unforgiving, particularly when attempting slow-speed maneuvers. This subjective experience can be influenced by the driver’s skill and experience with manual transmissions, as well as the overall condition of the clutch system. The clutch pedal’s travel and feel are also reported to vary slightly depending on the vehicle’s age and mileage; wear and tear can naturally impact the pedal’s responsiveness. Some owners have noted a slight amount of play in the pedal, which might affect the precision of engagement. While most owners seem content with the clutch’s functionality, potential issues, like clutch slippage or premature wear, should be considered. Regular inspection and maintenance are vital to ensure optimal clutch performance and longevity. The overall experience is dependent on numerous contributing factors, including driver skill and the vehicle’s condition.

Maintenance and Repair

Maintaining the Lexus IS250 manual transmission involves regular fluid changes and inspections. Potential issues include synchromesh problems, clutch wear, and occasional leaks. Parts availability might be slightly challenging due to the transmission’s rarity, potentially affecting repair costs.

Common Issues and Potential Problems

While generally robust, the Aisin RA6 manual transmission in the Lexus IS250 isn’t without its potential weaknesses. One frequently mentioned issue is difficulty with smooth shifting, particularly into certain gears. This can manifest as notching or grinding, often attributed to synchromesh wear, especially under high-mileage conditions. Another common complaint centers around rev hang, where engine RPMs linger slightly after releasing the throttle. This isn’t exclusive to the IS250, affecting various vehicles with electronic throttle control, yet it’s a notable characteristic often reported by owners. Clutch wear is a typical concern for any manual transmission, and the IS250 is no exception. Regular clutch fluid changes and cautious driving habits can mitigate excessive wear, but replacement might eventually be necessary depending on usage and driving style. Finally, while not incredibly common, minor leaks from seals or gaskets can occur over time, necessitating repair or replacement. Addressing these issues promptly helps prevent more extensive and costly damage later.

Parts Availability and Cost

The rarity of the manual transmission in the Lexus IS250 directly impacts parts availability and cost. While common wear items like clutch kits and synchros might be sourced from various aftermarket suppliers, finding specific transmission components might prove challenging. Genuine Lexus parts, known for their quality, often command a higher price than aftermarket alternatives. The cost of a complete transmission rebuild or replacement can be substantial, potentially exceeding several thousand dollars depending on labor rates and the extent of the required repairs. Used parts, if available, can offer a more budget-friendly option, but their condition and reliability must be carefully assessed. Online marketplaces and specialized parts suppliers focusing on Japanese vehicles can be valuable resources for locating both new and used components. Before undertaking any repairs, obtaining multiple quotes from different mechanics and parts providers is advisable to ensure cost-effectiveness and informed decision-making.

Finding a Used Lexus IS250 Manual

Locating a used Lexus IS250 with a manual transmission requires patience and persistence. Their rarity makes them highly sought after, resulting in limited availability and potentially higher prices compared to automatic counterparts. Online listings and specialized forums are recommended for locating these desirable vehicles.

Market Value and Availability

The market value and availability of a used Lexus IS250 manual transmission vehicle are significantly influenced by its rarity. Because the manual transmission option was not widely chosen, finding one on the used car market requires more effort than finding an automatic version. This scarcity often translates into a higher price tag compared to similar IS250 models with automatic transmissions. The condition of the vehicle, mileage, and any additional features or upgrades will also impact the final price. Online marketplaces and specialized forums dedicated to Lexus enthusiasts can be helpful resources to locate these less common models. However, be prepared to potentially expand your search geographically, as the availability may be limited within a specific region.

Factors affecting value include overall vehicle condition, service history, and any modifications. Low mileage examples, particularly those with complete service records, command premium prices. Conversely, high-mileage vehicles or those with a less-than-stellar maintenance history may be priced lower, offering a potential bargain for a mechanically inclined buyer willing to invest time and resources. Remember to thoroughly inspect any potential purchase, paying close attention to the clutch, transmission, and other key components before committing to a purchase.

python for data analysis 3rd edition wes mckinney pdf

Python for Data Analysis, 3rd Edition⁚ An Overview

Wes McKinney’s definitive guide, updated for Python 3.10 and pandas 1.4, provides a practical, modern introduction to data science tools in Python. This third edition offers comprehensive coverage of data manipulation, processing, cleaning, and analysis techniques using Pandas, NumPy, and Jupyter.

Wes McKinney’s Authorship and the Pandas Project

The third edition of “Python for Data Analysis” is authored by Wes McKinney, a prominent figure in the Python data science community and the creator of the Pandas library. Pandas, a powerful and versatile open-source library, is central to the book’s focus on data manipulation and analysis. McKinney’s deep expertise in Pandas is evident throughout the book, as he expertly guides readers through its functionalities and applications. The book serves as a comprehensive resource not only for learning Pandas but also for understanding its role within the broader Python data science ecosystem. His authorship lends significant credibility and authority to the content, making it a trusted guide for both beginners and experienced practitioners seeking to enhance their data analysis skills using Python and Pandas. The book’s success is intrinsically linked to McKinney’s profound knowledge and contributions to the field, solidifying its status as a leading resource in the domain of data analysis with Python.

Updates in the 3rd Edition and Python 3.10 Compatibility

The third edition of Wes McKinney’s “Python for Data Analysis” boasts significant updates reflecting advancements in the Python ecosystem. A key improvement is its full compatibility with Python 3.10, ensuring that readers can utilize the latest language features and benefits. Beyond Python version compatibility, the book incorporates updates to the Pandas library, reflecting the latest version (1.4 at the time of publication). These updates are not merely superficial; they address new functionalities, improved performance, and refined best practices within Pandas. The text is meticulously revised to align with these changes, providing readers with the most current and relevant information. Furthermore, the updated edition likely includes enhancements to the practical case studies and examples, ensuring they remain pertinent and illustrative of real-world data analysis challenges. This commitment to currency ensures the book remains a valuable resource for years to come, adapting to the ever-evolving landscape of Python and data science.

Accessing the Book⁚ Formats and Availability

A significant advantage of “Python for Data Analysis, 3rd Edition” is the availability of a completely free, open-access HTML version hosted directly on Wes McKinney’s personal website. This online edition serves as a valuable companion to the commercially published print and ebook versions. Readers can access the entire book’s content online without any cost, making it accessible to a broader audience. The open-access nature fosters inclusivity in data science education and research. This online version is regularly updated to reflect corrections and incorporate any necessary errata, ensuring that users always have access to the most current and accurate information. The convenience of readily accessible online content is particularly beneficial for students and researchers who may not have immediate access to traditional book formats. Furthermore, the online version allows for easy searching and navigation through the book’s extensive material. While it might lack some of the aesthetic features of a professional print or ebook version, the accessibility and regularly updated content of the open-access HTML version make it an indispensable resource for anyone interested in learning Python for data analysis.

Print and eBook Versions from O’Reilly Media

For those who prefer the traditional feel of a physical book or the convenience of an ebook, “Python for Data Analysis, 3rd Edition” is also available through O’Reilly Media in both print and ebook formats. The print version offers a tangible learning experience, ideal for those who prefer to read and annotate directly within the text. O’Reilly’s reputation for high-quality technical publications ensures a well-produced book with clear formatting and layout. The ebook version, available through various platforms, provides a convenient digital alternative, allowing readers to access the book anytime, anywhere, on a range of devices. Features like searchable text and adjustable font sizes enhance readability and usability. Purchasing from O’Reilly supports the author and publisher directly, contributing to the continued development and improvement of high-quality data science resources. Both the print and ebook formats provide the complete and up-to-date content, making them excellent choices for serious learners and professionals seeking a comprehensive reference on data analysis with Python.

Potential for PDF Downloads from Unofficial Sources

While the official channels for accessing “Python for Data Analysis, 3rd Edition” are through Wes McKinney’s website and O’Reilly Media, it’s important to acknowledge the potential existence of unofficial PDF downloads from various online sources. Downloading from these sources carries significant risks, including the possibility of encountering pirated copies containing malware or viruses that could compromise your computer’s security. Furthermore, the quality of these unofficial PDFs may be inferior, lacking proper formatting, potentially containing errors or missing sections, or even being incomplete versions of the book. Legally, downloading copyrighted material without proper authorization is a violation of intellectual property rights and may result in legal consequences. Supporting the author and publisher by purchasing the book legitimately ensures access to the complete, accurate, and officially supported version, along with the assurance that you are not compromising your digital security. Opting for official channels ensures a safe, reliable, and ethical acquisition of this valuable data science resource. Remember, ethical access supports ongoing improvements and future editions.

Content and Focus of the Book

This book masterfully blends practical data wrangling techniques with Python libraries like Pandas, NumPy, and Jupyter. It tackles real-world data analysis problems effectively, offering valuable insights and solutions.

Data Wrangling with Pandas, NumPy, and Jupyter

McKinney’s “Python for Data Analysis, 3rd Edition” delves into the core of data manipulation using Python’s powerful libraries. Pandas, a crucial library for data structures and analysis, is explored in detail, demonstrating how to efficiently handle and clean datasets. NumPy, the foundation for numerical computing in Python, provides the mathematical backbone for many data analysis operations, which are seamlessly integrated within the book’s examples. The interactive nature of Jupyter notebooks is leveraged throughout, allowing readers to experiment with code and visualize results directly within the learning process. The text guides users through importing, cleaning, transforming, and preparing data for analysis, covering essential techniques like data type conversion, handling missing values, and merging datasets. Furthermore, the book’s practical approach emphasizes real-world scenarios, making the learning process engaging and relevant to the reader’s needs. From basic data cleaning to advanced manipulations, the book equips you with the necessary skills to tackle diverse data challenges.

Practical Case Studies and Data Analysis Problems

Wes McKinney’s “Python for Data Analysis, 3rd Edition” distinguishes itself through its wealth of practical, real-world case studies. These examples aren’t mere theoretical exercises; they are designed to mirror the challenges faced by data analysts in various fields. The book meticulously guides readers through the process of tackling these problems using the Python ecosystem, emphasizing a hands-on, learn-by-doing approach. Each case study provides a detailed walkthrough, breaking down complex data analysis tasks into manageable steps. This allows readers to grasp the underlying logic and techniques effectively. From data cleaning and preprocessing to statistical analysis and visualization, the book covers a wide range of data analysis techniques. This holistic approach ensures that readers develop a strong understanding of the entire data analysis workflow. The problems presented are diverse, reflecting the versatility of Python in different analytical contexts. By working through these examples, readers build practical skills and gain confidence in applying Python to their own data analysis projects. The combination of theoretical concepts and practical applications makes this book an invaluable resource for aspiring data scientists.

Posted in PDF

lg lfxs26973s manual

LG LFXS26973S Manual⁚ A Comprehensive Guide

This manual provides a detailed guide to the LG LFXS26973S refrigerator‚ covering everything from installation to troubleshooting. Explore the product overview‚ key features‚ smart functions‚ and maintenance tips. Find essential information about the warranty‚ where to locate the manual‚ and more. This comprehensive guide will equip you with all the necessary knowledge to effectively use and maintain your LG LFXS26973S refrigerator.

Introduction

Welcome to the comprehensive guide for the LG LFXS26973S refrigerator. This manual is your essential companion to understanding and maximizing the features and functionality of your new appliance. The LG LFXS26973S is a smart French door refrigerator designed to elevate your kitchen experience with its advanced technology and spacious storage solutions. This manual covers everything from unpacking and installation to using the various smart functions and maintaining your refrigerator for optimal performance.

Whether you’re a seasoned chef or a casual cook‚ this guide will help you navigate the intricacies of the LG LFXS26973S. It provides detailed instructions‚ helpful tips‚ and troubleshooting advice to ensure you get the most out of your refrigerator. With this manual‚ you’ll be able to keep your food fresh‚ organized‚ and easily accessible‚ while enjoying the convenience and innovation that LG is known for.

Take your time to explore the content within this manual. It’s designed to empower you with the knowledge and confidence to confidently operate and maintain your LG LFXS26973S refrigerator for years to come. Feel free to refer back to this manual whenever you have questions or need to refresh your understanding of specific features or functions.

Product Overview

The LG LFXS26973S is a 26.2 cubic foot French door refrigerator with a sleek and modern design that complements any kitchen decor. Its spacious interior offers ample room for storing a variety of food items and beverages‚ making it ideal for families or those who enjoy entertaining. The refrigerator boasts a host of innovative features designed to enhance freshness‚ convenience‚ and energy efficiency.

The LG LFXS26973S is equipped with dual ice makers‚ ensuring you’ll never run out of ice for your drinks or cocktails. This feature eliminates the need for bulky ice trays and provides continuous ice production. The SpacePlus Ice System allows you to maximize storage space in the freezer compartment by using a slimmer ice maker design.

The refrigerator also features a water and ice dispenser‚ offering easy access to chilled water and ice cubes. This is a convenient addition for busy households‚ allowing you to quickly quench your thirst or add ice to your drinks without having to open the refrigerator door. The LG LFXS26973S is ENERGY STAR certified‚ indicating its energy efficiency and commitment to sustainability.

Key Features

The LG LFXS26973S is packed with innovative features that enhance convenience‚ freshness‚ and energy efficiency. These key features contribute to a superior refrigerator experience⁚

  • Smart Cooling Plus⁚ This technology maintains optimal humidity and temperature levels throughout the refrigerator‚ ensuring that your food stays fresh for longer. It also helps to prevent freezer burn by controlling the humidity levels in the freezer compartment.
  • Dual Ice Makers⁚ With two ice makers‚ you’ll never run out of ice. One is located in the freezer compartment‚ while the other is a door-in-door ice maker‚ providing convenient access to ice without opening the entire refrigerator door.
  • SpacePlus Ice System⁚ This feature uses a slimmer ice maker design‚ freeing up valuable space in the freezer compartment. This allows you to store more food items and maximize the refrigerator’s storage capacity.
  • Door-in-Door⁚ This innovative design provides quick access to frequently-used items without opening the entire refrigerator door. It helps to maintain cold air inside the refrigerator and prevents temperature fluctuations.
  • GlideNServe Shelves⁚ These shelves are designed to slide out smoothly‚ allowing you to easily access items stored in the back of the refrigerator. The shelves are also adjustable to accommodate different sizes of food containers.
  • PrintProof™ Stainless Steel⁚ The refrigerator’s exterior is made of fingerprint-resistant stainless steel‚ making it easy to clean and maintain. This feature helps to keep the refrigerator looking its best‚ even with frequent use.
  • LG ThinQ App⁚ This app allows you to remotely monitor and control your refrigerator from your smartphone or tablet. You can adjust temperature settings‚ manage ice production‚ and receive notifications about potential issues.

Installation Guide

The LG LFXS26973S refrigerator installation process is straightforward but requires careful attention to ensure proper operation and safety. Follow these steps for a successful installation⁚

  1. Unpacking⁚ Carefully unpack the refrigerator‚ removing all packing materials and accessories. Ensure that the refrigerator is free of any damage.
  2. Location Selection⁚ Choose a suitable location for the refrigerator‚ ensuring it is level and has adequate clearance for ventilation. The refrigerator should be placed away from direct sunlight or heat sources.
  3. Water Line Connection⁚ Connect the water line to the refrigerator’s water inlet valve. Ensure the water supply is cold and the water pressure is within the recommended range (20-120 psi).
  4. Leveling⁚ Use the adjustable leveling feet to ensure the refrigerator is level. This will prevent the refrigerator from tipping over and ensure proper operation.
  5. Door Alignment⁚ Align the doors to ensure they close properly and seal tightly. Adjust the hinges if necessary. This will help maintain the refrigerator’s cold temperature and prevent energy loss.
  6. Electrical Connection⁚ Connect the refrigerator to a dedicated electrical outlet. Ensure the outlet is properly grounded and can handle the refrigerator’s power requirements.
  7. Initial Operation⁚ After installation‚ allow the refrigerator to cool down for at least 24 hours before adding food. This ensures the refrigerator reaches its optimal temperature and can properly preserve your food.

Refer to the detailed instructions in the LG LFXS26973S user manual for specific guidance on installation procedures and troubleshooting tips.

Using the LG LFXS26973S Refrigerator

Using the LG LFXS26973S refrigerator is intuitive and designed for optimal food preservation. Here’s a guide to maximizing its features⁚

  • Temperature Control⁚ The control panel allows you to adjust the refrigerator and freezer temperatures to your preference. Refer to the manual for recommended settings.
  • Door-in-Door⁚ The Door-in-Door feature provides quick access to frequently used items without opening the entire refrigerator compartment‚ minimizing cold air loss.
  • GlideNServe Shelves⁚ These shelves are designed for smooth and easy access to your food. Slide them out for convenient loading and unloading.
  • Humidity Controlled Crispers⁚ The crispers offer optimal humidity control for different types of produce‚ ensuring they stay fresh and flavorful longer.
  • Ice and Water Dispenser⁚ Enjoy convenient access to ice and chilled water with the built-in dispenser. The dual ice makers ensure you always have a plentiful supply.
  • Smart Cooling Plus⁚ This technology maintains optimal temperature and humidity levels throughout the refrigerator‚ ensuring even cooling and consistent freshness.
  • LED Lighting⁚ The interior LED lighting provides clear visibility of your stored food‚ making it easy to find what you need.
  • Air Filter⁚ The air filter helps reduce odors and maintain a fresh environment inside the refrigerator.

For detailed instructions on using specific features‚ refer to the comprehensive user manual provided with your LG LFXS26973S refrigerator.

Smart Functions

The LG LFXS26973S refrigerator boasts a range of smart features designed to enhance convenience‚ efficiency‚ and control. These functions are accessible through the LG ThinQ app‚ connecting your refrigerator to your smartphone or smart home ecosystem.

  • LG ThinQ Application⁚ The LG ThinQ app allows you to remotely monitor and control your refrigerator’s settings‚ including temperature adjustments‚ ice maker activation‚ and water filter status. It also provides helpful notifications and alerts‚ keeping you informed about potential issues.
  • Smart Grid Function⁚ This feature allows you to optimize your refrigerator’s energy consumption by adjusting its operation based on electricity prices and your preferred settings. It can automatically shift to a power-saving mode during peak hours‚ helping you save on energy costs.
  • Smart Diagnosis Feature⁚ In case of any issues with your refrigerator‚ the Smart Diagnosis feature allows you to troubleshoot problems quickly and effectively. Simply connect your refrigerator to the LG ThinQ app and follow the on-screen instructions to diagnose and resolve common issues.

These smart functions provide a seamless and connected experience‚ allowing you to manage your refrigerator conveniently and efficiently from anywhere with an internet connection.

Maintenance and Cleaning

Regular maintenance and cleaning are essential for keeping your LG LFXS26973S refrigerator in optimal condition and ensuring its longevity. Here’s a guide to maintaining your refrigerator⁚

  • Cleaning⁚ Clean the interior of your refrigerator regularly with a mild detergent solution and a soft cloth. Avoid using abrasive cleaners or harsh chemicals that can damage the surfaces. Wipe down the shelves‚ drawers‚ and door bins to remove any spills or food residue. Also‚ remember to clean the exterior of the refrigerator‚ including the doors‚ handles‚ and control panel.
  • Air Filter⁚ The air filter helps to eliminate odors and maintain fresh air inside the refrigerator. It’s recommended to replace the air filter every six months or as needed. You can find replacement air filters at authorized LG retailers or online.
  • Water Filter⁚ Your refrigerator’s water filter purifies the water dispensed from the dispenser. It’s important to replace the water filter every six months to ensure the best water quality. You can easily replace the filter by following the instructions in your owner’s manual.

By following these maintenance tips‚ you can keep your LG LFXS26973S refrigerator clean‚ odor-free‚ and functioning efficiently for years to come.

Troubleshooting Tips

While the LG LFXS26973S refrigerator is designed for reliable performance‚ occasional issues may arise. Here are some troubleshooting tips to help you address common problems⁚

  • Temperature Issues⁚ If your refrigerator is not maintaining the desired temperature‚ check the temperature settings on the control panel. Ensure the refrigerator is not overloaded with food‚ as this can hinder proper cooling. Also‚ make sure the refrigerator door seals are intact and not damaged.
  • Ice Maker Issues⁚ If your ice maker is not producing ice‚ ensure the water supply line is connected and the water valve is turned on. Check the ice maker’s water inlet for any blockages. You may also need to reset the ice maker by pressing and holding the ice maker button for a few seconds.
  • Dispenser Issues⁚ If the water or ice dispenser is not working‚ check the water supply line and ensure the water valve is turned on. Make sure the dispenser lever is not stuck or blocked. If the problem persists‚ you may need to check the dispenser’s internal components for any malfunction.
  • Noise Issues⁚ If your refrigerator is making unusual noises‚ check if any items are blocking the air vents or fan. Ensure the refrigerator is level and not vibrating due to uneven flooring. If the noise continues‚ consult your owner’s manual or contact LG customer support for assistance.

If you’re unable to resolve the issue after trying these troubleshooting steps‚ it’s recommended to contact LG customer support for professional assistance.

Warranty Information

The LG LFXS26973S refrigerator comes with a standard manufacturer’s warranty‚ which covers defects in materials and workmanship. The specific warranty terms and conditions may vary depending on your region and purchase location. It’s essential to review the warranty documentation that came with your refrigerator for detailed information.

Typically‚ LG offers a limited warranty that covers the refrigerator’s major components for a specified period. This warranty may include coverage for parts‚ labor‚ and in-home service. In some cases‚ extended warranties may be available for purchase‚ offering additional coverage and peace of mind.

To file a warranty claim‚ you’ll typically need to provide proof of purchase‚ such as a receipt or invoice. It’s advisable to retain all warranty documents and keep them in a safe place for easy access. If you encounter any issues with your refrigerator during the warranty period‚ contact LG customer support for assistance in filing a claim.

Remember‚ the warranty may not cover damages caused by misuse‚ neglect‚ or accidents. It’s essential to follow the care and maintenance guidelines provided in the owner’s manual to ensure your refrigerator remains in good working condition and is eligible for warranty coverage.

Where to Find the Manual

Accessing the user manual for your LG LFXS26973S refrigerator is a straightforward process. LG provides multiple avenues to obtain this valuable resource‚ ensuring you have the information you need at your fingertips.

The most convenient option is to download the manual directly from LG’s website. Simply visit the LG website and navigate to the product support section. Search for your model number‚ “LFXS26973S‚” and you’ll find a dedicated page with various resources‚ including the user manual. You can then download the manual in PDF format for easy viewing and printing.

Alternatively‚ you can also find the manual through online platforms like ManualsLib. This website provides a vast collection of user manuals for various appliances and electronic devices. Search for “LG LFXS26973S” on ManualsLib‚ and you’ll likely find the manual available for download.

If you prefer a physical copy‚ you can contact LG customer support to request a printed manual. They can provide you with information on how to obtain a copy via mail or other delivery options.

Having the user manual readily available will empower you to understand your refrigerator’s functionalities‚ troubleshoot common issues‚ and ensure proper maintenance.

The LG LFXS26973S refrigerator is a sophisticated appliance designed to enhance your culinary experience and simplify your life. With its spacious capacity‚ advanced features‚ and smart capabilities‚ it offers a seamless blend of convenience and efficiency. This comprehensive manual has provided you with a thorough understanding of the product’s functionalities‚ from installation and operation to maintenance and troubleshooting. By familiarizing yourself with the information presented‚ you can maximize the potential of your LG LFXS26973S refrigerator and enjoy the benefits of a well-maintained and efficient appliance.

Remember to refer to this manual regularly for guidance on using and caring for your refrigerator. Should you encounter any issues‚ the troubleshooting section provides helpful tips to resolve common problems. Additionally‚ LG’s website and customer support are valuable resources for accessing further assistance and resolving any queries. Equipped with this knowledge‚ you can confidently navigate the world of refrigerator ownership and make the most of your LG LFXS26973S investment.

Ultimately‚ the LG LFXS26973S refrigerator is more than just an appliance; it’s a partner in creating a well-organized and enjoyable culinary journey. By understanding and utilizing its features effectively‚ you can elevate your kitchen experience and savor the convenience and freshness it provides.

barefoot landing store map pdf

Barefoot Landing⁚ A Shopping and Entertainment Destination

Barefoot Landing is a premier shopping, dining, and entertainment destination located in North Myrtle Beach, South Carolina. Situated on a 27-acre lake and along the Intracoastal Waterway, Barefoot Landing offers a unique shopping experience in a relaxed boardwalk atmosphere.

Location and Overview

Barefoot Landing is a vibrant shopping, dining, and entertainment complex nestled in the heart of North Myrtle Beach, South Carolina. Located at 4898 Hwy 17 South, this sprawling destination spans a picturesque 27-acre lakefront setting, offering a unique blend of coastal charm and urban excitement. The complex is situated along the Intracoastal Waterway, providing a picturesque backdrop for leisurely strolls and scenic views. Visitors can easily access the complex from Highway 17, a major thoroughfare connecting North Myrtle Beach to other coastal destinations.

At the heart of Barefoot Landing lies a sprawling open-air promenade, lined with an eclectic mix of shops, restaurants, and entertainment venues. The promenade’s design evokes a relaxed, boardwalk atmosphere, inviting visitors to wander leisurely and explore the diverse offerings. A central focal point of the complex is the 27-acre lake, which provides a serene backdrop for outdoor dining, strolling, and enjoying the scenic beauty of the area. The lake is also home to the iconic “Barefoot Landing” fountain, a mesmerizing centerpiece that adds to the lively atmosphere of the complex.

Barefoot Landing is known for its diverse mix of attractions, catering to a wide range of interests. From upscale boutiques to specialty gift stores, visitors can find a variety of retail therapy options. The complex boasts over 100 specialty and retail shops, featuring everything from clothing and jewelry to home decor and souvenirs. Foodies will delight in the diverse culinary scene, with over 15 restaurants offering everything from casual dining to upscale cuisine. Entertainment options abound, with live music venues, a state-of-the-art theater, and a variety of family-friendly attractions. Barefoot Landing is a destination that caters to all ages and interests, making it an ideal choice for a day of shopping, dining, and entertainment.

Shopping at Barefoot Landing

Barefoot Landing offers a unique shopping experience, boasting over 100 specialty and retail shops that cater to a wide range of interests. From upscale boutiques to charming gift stores, visitors can find everything from trendy apparel and accessories to home décor and souvenirs. One of the highlights of shopping at Barefoot Landing is the relaxed, boardwalk atmosphere. The open-air promenade is lined with inviting storefronts, creating a leisurely and enjoyable shopping experience. The complex is also home to a variety of unique shops, each offering a distinct selection of merchandise.

For those seeking upscale fashion and accessories, Barefoot Landing offers a curated selection of boutiques. For shoppers interested in home décor and gifts, there are specialty stores featuring handcrafted items, unique home accents, and gifts for every occasion. The complex also caters to those seeking unique souvenirs and local crafts, with shops offering a variety of items that capture the spirit of the South Carolina coast. For the convenience of shoppers, Barefoot Landing offers a comprehensive store directory, accessible online or in print form. This directory provides details on each store, including its location, hours of operation, and a brief description of its offerings.

Beyond the retail offerings, Barefoot Landing offers a variety of amenities that enhance the shopping experience. Ample parking is available throughout the complex, ensuring easy access to the stores. Restrooms and public seating areas are conveniently located throughout the promenade, providing a comfortable environment for shoppers. The complex also features a variety of food and beverage options, allowing shoppers to refuel and enjoy a break during their retail adventures. With its diverse selection of shops, relaxed atmosphere, and convenient amenities, Barefoot Landing provides a truly memorable shopping experience for visitors of all ages and interests.

Dining Options at Barefoot Landing

Barefoot Landing offers a diverse selection of dining options, catering to every taste and preference. From casual eateries to upscale restaurants, visitors can enjoy a variety of cuisines and atmospheres. The complex is home to over 15 restaurants, each offering a unique dining experience. For those seeking casual fare, Barefoot Landing features a variety of eateries serving up classic American dishes, fresh seafood, and international flavors. These casual restaurants provide a relaxed and comfortable setting for a quick bite or a leisurely meal with friends and family. For a more refined dining experience, Barefoot Landing offers upscale restaurants featuring innovative menus and elegant settings. These restaurants provide a sophisticated ambiance and impeccable service, making them ideal for special occasions or romantic evenings.

Beyond the traditional restaurants, Barefoot Landing also features a variety of unique dining experiences. The complex is home to several waterfront restaurants, offering breathtaking views of the Intracoastal Waterway and the surrounding lake; These restaurants provide a picturesque setting for enjoying a meal while taking in the beauty of the natural surroundings. Barefoot Landing also features a variety of bars and pubs, offering a relaxed atmosphere for enjoying drinks and socializing. These establishments provide a casual and convivial setting for meeting up with friends or enjoying a nightcap after a day of shopping or exploring. With its diverse selection of restaurants, bars, and unique dining experiences, Barefoot Landing provides a culinary journey for every palate and occasion. Whether you’re seeking a casual bite or a gourmet meal, the complex offers a variety of options to satisfy your hunger and create lasting memories.

Entertainment at Barefoot Landing

Barefoot Landing offers a vibrant array of entertainment options, ensuring a memorable experience for visitors of all ages. At the heart of the entertainment scene is the “Barefoot Landing Lake”, a 27-acre lake that serves as a picturesque backdrop for various activities. Visitors can enjoy leisurely boat rides, scenic strolls along the lake’s edge, and even partake in exciting water sports. The lake’s presence adds a touch of natural beauty and tranquility to the bustling atmosphere of Barefoot Landing.

Beyond the lake, Barefoot Landing features a variety of live entertainment options, including musical performances, theatrical shows, and interactive exhibits. The complex hosts a regular calendar of events, ensuring there is always something to keep visitors entertained. From local musicians showcasing their talents to renowned performers captivating audiences, Barefoot Landing provides a stage for a diverse range of entertainment experiences. For those seeking a more interactive experience, Barefoot Landing offers a variety of attractions, including a carousel, a miniature golf course, and a children’s play area. These attractions provide a fun and engaging experience for families and individuals of all ages. Whether you’re seeking a relaxing stroll along the lake, a thrilling musical performance, or an interactive experience, Barefoot Landing has something to offer everyone. The complex’s commitment to providing diverse entertainment options ensures that visitors can enjoy a memorable and engaging experience during their visit.

Barefoot Landing Events and Activities

Barefoot Landing hosts a diverse calendar of events and activities throughout the year, offering a vibrant and engaging experience for visitors. The complex is known for its lively atmosphere, with events ranging from seasonal celebrations to unique cultural experiences. Throughout the year, Barefoot Landing transforms into a festive hub, hosting events like the annual “Christmas in July” celebration, a delightful summer tradition that brings a touch of holiday cheer to the warm months. The “Barefoot Landing Christmas Festival” in December is a beloved holiday spectacle, featuring dazzling light displays, festive decorations, and a magical atmosphere.

Beyond seasonal celebrations, Barefoot Landing offers a variety of events and activities that cater to diverse interests. From live music performances featuring local and renowned artists to interactive exhibits showcasing local crafts and artistry, there’s something for everyone to enjoy. The complex also hosts special events, like food festivals and art shows, providing opportunities for visitors to experience the vibrant culture and culinary scene of the region. For those seeking a more active experience, Barefoot Landing offers a range of activities, including guided tours, fishing excursions, and water sports. These activities provide an opportunity to explore the natural beauty of the surrounding area while enjoying the excitement of outdoor adventures.

Barefoot Landing’s commitment to hosting a diverse range of events and activities ensures that visitors can enjoy a memorable and engaging experience. Whether you’re seeking festive celebrations, cultural experiences, or active adventures, Barefoot Landing provides a vibrant and welcoming atmosphere for all.

Planning Your Visit to Barefoot Landing

Planning your visit to Barefoot Landing is an exciting endeavor, ensuring you make the most of your time at this vibrant destination. Start by exploring the Barefoot Landing website, a treasure trove of information to guide your planning. The website features a comprehensive map, detailing the layout of the complex, highlighting the locations of shops, restaurants, and entertainment venues. This interactive map is an invaluable tool for navigating the sprawling complex, allowing you to pinpoint your desired destinations and plan your route efficiently.

To enhance your visit, consider downloading the Barefoot Landing mobile brochure, a handy digital resource providing detailed information on the complex’s diverse offerings. This brochure offers a convenient overview of the shops, restaurants, and entertainment options available, making it easy to identify your interests and plan your itinerary. The brochure also includes a calendar of events, showcasing the exciting activities and celebrations scheduled during your visit. This feature ensures you don’t miss out on any special events or performances that align with your preferences.

With a well-planned itinerary, you’ll be equipped to experience the full range of delights that Barefoot Landing has to offer, from exploring unique boutiques to indulging in culinary delights and enjoying captivating entertainment. Remember to factor in ample time to explore the diverse offerings of this vibrant destination, ensuring you have time to truly immerse yourself in the unique ambiance and discover hidden gems within the complex.

Getting to Barefoot Landing

Reaching Barefoot Landing is a breeze, with various transportation options catering to your preferences. Whether you’re driving, flying, or taking a scenic coastal route, finding your way to this vibrant destination is a straightforward affair. If you’re driving, the complex is conveniently located just off Highway 17 South in North Myrtle Beach, South Carolina. The address for easy navigation is 4898 Hwy 17 South, North Myrtle Beach, South Carolina. For those flying into the area, Myrtle Beach International Airport (MYR) is the closest airport, a short drive away from Barefoot Landing.

For a more relaxed and scenic journey, consider exploring the scenic coastal routes leading to Barefoot Landing. The picturesque roads offer a chance to soak in the breathtaking beauty of the South Carolina coastline, making the journey an enjoyable experience in itself. If you’re planning a visit from another part of the state or a neighboring state, consider utilizing the extensive network of highways and interstates that connect you to North Myrtle Beach, ensuring a smooth and convenient drive.

No matter your mode of transportation, reaching Barefoot Landing is a simple affair, allowing you to focus on the exciting experiences that await you within the vibrant complex. Once you arrive, you’ll be greeted by the welcoming atmosphere and the myriad of attractions that make Barefoot Landing a must-visit destination in North Myrtle Beach.

Barefoot Landing Accommodation Options

For those seeking an immersive and convenient stay near the excitement of Barefoot Landing, a variety of accommodation options are available, ensuring a comfortable and memorable experience. The nearby Barefoot Resort, a renowned destination in itself, offers a range of accommodations to suit every traveler’s needs. From luxurious villas and spacious condos to charming cottages and comfortable hotel rooms, the resort provides a haven of comfort and relaxation.

The resort’s prime location, just a short distance from Barefoot Landing, allows guests to easily access the shopping, dining, and entertainment attractions without the hassle of long commutes. Whether you’re seeking a romantic getaway, a family vacation, or a relaxing retreat, the resort’s amenities cater to diverse preferences, including swimming pools, golf courses, and a variety of dining options.

Beyond the resort, a range of hotels and motels in North Myrtle Beach offer convenient access to Barefoot Landing. These accommodations provide a comfortable and affordable stay, allowing you to explore the area’s attractions at your own pace. Whether you’re looking for a budget-friendly stay or a luxurious retreat, the diverse range of hotels and motels in the vicinity provides a convenient base for your Barefoot Landing adventure.

Posted in PDF

koronka do miłosierdzia bożego pdf

Koronka do Miłosierdzia Bożego⁚ A Comprehensive Guide

This guide provides a complete overview of the Divine Mercy Chaplet, including its history, origins, prayers, and significance in modern Catholicism. Discover how to pray the chaplet, the promises associated with it, and its spiritual benefits. Learn where to access PDF downloads and resources for personal devotion.

The History and Origins of the Chaplet

The Divine Mercy Chaplet, a powerful Catholic devotion, boasts a relatively recent yet profoundly impactful history. Its origins trace back to the revelations of Jesus Christ to Saint Faustina Kowalska in the 1930s. During these mystical encounters, documented in her Diary, Jesus revealed the chaplet as a potent spiritual weapon, a means of obtaining mercy for oneself and for the whole world. He dictated the prayers and emphasized the importance of reciting the chaplet, promising immense spiritual benefits to those who faithfully practice this devotion. The specific date of its revelation is recorded as September 13-14, 1935, in Vilnius, Lithuania. The chaplet’s structure, incorporating invocations and the repetition of specific prayers, reflects a unique blend of traditional Catholic prayer forms adapted to convey the specific message of God’s boundless mercy. Its rapid spread across the globe following the canonization of Saint Faustina Kowalska highlights the chaplet’s enduring appeal and the widespread desire for spiritual solace and divine mercy.

Saint Faustina Kowalska and Divine Revelation

Saint Maria Faustina Kowalska (1905-1938), a Polish Roman Catholic nun, serves as the pivotal figure in the history of the Divine Mercy Chaplet. Through her, Jesus Christ revealed the chaplet and its profound spiritual significance. Faustina’s Diary, a chronicle of her mystical experiences, provides invaluable insight into the divine revelations that led to the chaplet’s creation. In her writings, she recounts Jesus’s instructions regarding the prayers, their arrangement, and the intentions behind each part of the devotion. These detailed accounts underscore the chaplet’s authenticity and divine origin, confirming its unique status as a prayer directly revealed by Christ himself. Faustina’s role extended beyond merely receiving the revelation; she actively promoted the devotion, emphasizing the importance of trusting in God’s mercy and sharing this message with others. Her unwavering faith and obedience to divine will cemented her place as the key figure through whom the Divine Mercy Chaplet came into existence, impacting countless lives across the globe.

The Text of the Chaplet⁚ Prayers and Intentions

The Divine Mercy Chaplet consists of a specific sequence of prayers recited on rosary beads. It begins with one “Our Father,” one “Hail Mary,” and the Apostles’ Creed. The core of the chaplet involves repeating, on the larger beads, the following invocation⁚ “Eternal Father, I offer You the Body and Blood, Soul and Divinity of Your dearly beloved Son, Our Lord Jesus Christ, in atonement for our sins and those of the whole world.” This central prayer is then followed, on the smaller beads, by the phrase⁚ “For the sake of His sorrowful Passion, have mercy on us and on the whole world.” This sequence is repeated ten times, corresponding to the ten sets of smaller beads on a standard rosary. The chaplet’s structure reflects a profound theological message, emphasizing the sacrificial love of Jesus Christ and the boundless mercy of God the Father. Each repetition of the central prayer underscores the offering of Christ’s sacrifice for the redemption of humanity. The invocation for mercy reflects the core message of divine mercy and the hope for forgiveness and salvation.

How to Pray the Chaplet⁚ A Step-by-Step Guide

Begin by making the Sign of the Cross. Next, recite one “Our Father,” one “Hail Mary,” and the Apostles’ Creed. This sets the intention and context for the prayer. Then, on the larger bead, say the following⁚ “Eternal Father, I offer You the Body and Blood, Soul and Divinity of Your dearly beloved Son, Our Lord Jesus Christ, in atonement for our sins and those of the whole world.” Subsequently, on each of the five smaller beads, repeat⁚ “For the sake of His sorrowful Passion, have mercy on us and on the whole world.” This sequence constitutes one decade of the chaplet. Repeat this decade a total of ten times, moving through all the larger and smaller beads. The repetition emphasizes the weight of the prayer’s message. After completing ten decades, conclude with the following prayers⁚ “Holy God, Holy Mighty One, Holy Immortal One, have mercy on us and on the whole world.” and “For the sake of His sorrowful Passion, have mercy on us and on the whole world.” Finally, make the Sign of the Cross to conclude the prayer. This step-by-step approach ensures proper reverence and understanding during the prayer.

The Promises Associated with the Chaplet

The Divine Mercy Chaplet carries profound promises attached to its devout recitation. Jesus himself, as recounted by St. Faustina, assures those who pray the chaplet of significant spiritual benefits. Among the most prominent promises is the assurance of God’s mercy upon the souls of the dying. For those who pray the chaplet regularly, and especially for those who offer it for the dying, a special grace of mercy is promised. The soul’s salvation is not guaranteed, but the grace offered enhances the chances of a peaceful passing and a merciful judgment. Furthermore, the faithful recitation of the chaplet is believed to bring about a softening of God’s anger, replacing it with divine compassion. This promise offers comfort and hope in times of trial and difficulty. The promises also extend to the forgiveness of sins and the alleviation of suffering. While not a guarantee of earthly prosperity, the prayer offers solace and spiritual strength to those facing hardship. This spiritual comfort and strength are essential in navigating life’s trials. The Chaplet is a powerful tool for spiritual growth and a source of God’s unwavering love and compassion.

The Chaplet’s Significance in Modern Catholicism

The Divine Mercy Chaplet holds a significant place within modern Catholicism, representing a powerful expression of God’s boundless mercy and compassion. Its growing popularity reflects a renewed focus on the merciful nature of God, a theme central to the teachings of the Catholic Church. The chaplet serves as a tangible reminder of God’s unwavering love, offering solace and hope to individuals facing spiritual or personal struggles. The accessibility of the prayer, both in its simplicity and readily available resources like PDFs, has contributed to its widespread adoption. Its concise structure makes it easy for individuals to incorporate into their daily routines, fostering a deeper connection with God through regular devotion. The chaplet’s emphasis on divine mercy aligns with the Church’s ongoing efforts to promote understanding and compassion within the world. Its simple yet profound message resonates with people from diverse backgrounds and faith journeys. This widespread appeal, coupled with the documented spiritual experiences of those who pray it, firmly establishes the Divine Mercy Chaplet as a significant and enduring element of contemporary Catholic devotion. Its continued prominence testifies to its enduring power and its ongoing relevance in a world seeking solace and divine grace.

Spiritual Benefits and Experiences

Numerous individuals report profound spiritual benefits from praying the Divine Mercy Chaplet. These experiences often involve a deepened sense of God’s presence, a feeling of peace and tranquility, and a renewed sense of hope and forgiveness. Many describe a strengthened faith and a more profound understanding of God’s merciful love. The act of prayer itself can be a powerful source of consolation, offering a refuge from the anxieties and stresses of daily life. Some individuals report receiving specific graces or answered prayers through their devotion to the chaplet. These experiences are often deeply personal and transformative, leading to a greater commitment to prayer and spiritual growth. The chaplet’s focus on mercy can lead to increased compassion and empathy towards oneself and others, fostering forgiveness and reconciliation. The simple, repetitive nature of the prayer can be meditative, allowing for a quiet contemplation of God’s love and mercy. For many, the Chaplet becomes a source of spiritual strength and guidance, offering comfort during times of difficulty and inspiring a deeper relationship with the divine. These varied and powerful spiritual benefits highlight the profound impact of this simple yet profound prayer.

The Chaplet and Divine Mercy Sunday

Divine Mercy Sunday, observed annually on the second Sunday of Easter, holds a special significance for the Divine Mercy Chaplet. Established by Saint John Paul II, this day is dedicated to celebrating God’s boundless mercy and compassion. The Chaplet, revealed to Saint Faustina Kowalska by Jesus himself, is deeply interwoven with this solemnity; It’s a powerful way to participate in the spiritual graces offered on this holy day. Many Catholics worldwide gather in churches and homes to pray the Chaplet collectively on Divine Mercy Sunday, creating a powerful atmosphere of prayer and communal devotion. The prayers of the Chaplet, focused on God’s mercy and Jesus’ sacrifice, resonate deeply with the themes of forgiveness and redemption central to Divine Mercy Sunday. Participating in the Chaplet on this day is seen as a particularly potent way to receive spiritual blessings and to unite oneself with the global community of believers celebrating God’s merciful love. The day’s focus on mercy is perfectly complemented by the Chaplet’s meditative repetition, allowing for profound contemplation of God’s infinite compassion and its transformative power in one’s life. This convergence of the Chaplet and Divine Mercy Sunday underscores the profound importance of both within the Catholic faith.

Accessing the Chaplet⁚ PDF Downloads and Resources

The widespread availability of the Divine Mercy Chaplet in digital format makes it readily accessible for personal use and distribution. Numerous websites and online resources offer downloadable PDF versions of the Chaplet, providing both the text of the prayers and instructions on how to pray it. These PDFs often include different formats catering to diverse preferences, such as those with larger fonts for easier reading or those designed for printing on standard paper sizes. Some websites also offer audio versions of the Chaplet, enabling those who prefer listening to pray along. Additionally, many Catholic websites and apps incorporate the Chaplet into their digital prayer resources, often alongside other devotional material. This digital accessibility ensures that the Chaplet is not confined to physical books or pamphlets, making it convenient for personal use, group prayer, and sharing with others. The ease with which one can access and distribute these digital versions promotes wider participation and encourages the spread of this powerful devotion. Whether you prefer a printed copy or a digital version, the resources are readily available to support your prayer life.

The Chaplet’s Impact on Personal Devotion

The Divine Mercy Chaplet has profoundly impacted personal devotion for many Catholics worldwide. Its concise yet powerful prayers offer a focused path to connect with God’s mercy and experience a deeper relationship with Jesus Christ. The repetition of the short prayers fosters a meditative state, allowing individuals to reflect on their lives and seek divine forgiveness. Many individuals report a sense of peace and solace after praying the Chaplet, feeling a renewed sense of hope and trust in God’s unwavering love. This simple yet profound prayer has become a cornerstone of daily spiritual practice for many, enriching their prayer lives and deepening their faith. The accessibility of the Chaplet through various mediums, including readily available PDFs, further contributes to its wide adoption and integration into daily routines. Its uncomplicated structure allows for individuals of all ages and levels of spiritual understanding to readily participate. Furthermore, the Chaplet’s association with Divine Mercy Sunday adds another layer of significance, encouraging regular participation and a collective experience of faith.

Posted in PDF

ao smith bths-750a installation manual

AO Smith BTHS-750A Installation⁚ A Comprehensive Guide

This guide provides a step-by-step approach to installing your AO Smith BTHS-750A water heater. Safety precautions, pre-installation checks, and detailed instructions for gas, electrical, and water connections are included. Troubleshooting tips and maintenance advice ensure optimal performance.

Safety Precautions and Warnings

Before commencing any installation or maintenance procedures on your AO Smith BTHS-750A water heater, prioritize safety. Always disconnect the gas supply and electrical power before undertaking any work. Ensure adequate ventilation to prevent the buildup of combustion byproducts. Wear appropriate safety gear, including gloves and eye protection, to avoid potential injuries from sharp edges or escaping gas. Consult the local gas utility and building codes for compliance requirements before installation. Never attempt to operate the water heater with a damaged or leaking gas line. If you detect any gas leaks, immediately ventilate the area and contact a qualified gas technician. Regularly inspect the water heater for any signs of damage or corrosion, and promptly address any issues identified. Never modify or tamper with the safety devices incorporated in the appliance. Improper installation or operation can lead to serious injury or property damage. If you are unsure about any aspect of the installation process, consult a qualified professional. Remember, your safety and the safety of others are paramount. Failure to adhere to these safety precautions can void the warranty and result in hazardous conditions. Carefully read all instructions and warnings provided in the complete installation manual before proceeding.

Pre-Installation Checklist and Requirements

Before beginning the AO Smith BTHS-750A installation, meticulously review this checklist. Confirm you have all necessary tools and materials⁚ adjustable wrenches, pipe wrenches, gas line connectors (appropriate for your gas type), electrical wiring and connectors, plumbing fittings, and a level. Verify the location meets code requirements for ventilation, gas line access, and electrical connections. Ensure sufficient clearance around the water heater for maintenance access – consult the dimensions specified in the installation manual. Check the gas supply line pressure and ensure it’s compatible with the water heater’s requirements. Inspect the water supply lines for leaks or damage before connecting them to the unit. Confirm that the electrical supply matches the voltage and amperage requirements detailed in the specifications. Obtain all necessary permits from your local authorities before starting the installation process. A stable and level surface is crucial; use shims if needed to ensure the water heater is correctly plumbed; Finally, have a qualified professional assist if you lack the necessary experience or expertise with gas or electrical systems. Thorough preparation minimizes potential delays and ensures a smooth installation.

Detailed Step-by-Step Installation Instructions

Precisely follow these steps for installing your AO Smith BTHS-750A. Begin by positioning the unit on a level surface, using shims if needed to achieve perfect leveling. Securely attach the mounting brackets according to the manufacturer’s specifications. Carefully connect the gas supply line, ensuring all connections are tight and leak-free. Use the appropriate sealant and follow all safety guidelines for gas line connections. Next, connect the water supply lines, double-checking for leaks. Ensure the water pressure meets the recommended range. Connect the electrical wiring, meticulously adhering to the wiring diagram provided in the installation manual. Use the correct gauge wire and ensure proper grounding. Once the connections are complete, visually inspect all connections for leaks or loose fittings. Before turning on the gas or electricity, carefully check your work to prevent problems. After verifying all connections, turn on the gas supply and then turn on the power. Follow the instructions for initial operation, allowing the water heater to heat up to the desired temperature. Finally, check for leaks and any other potential problems during the initial operation. Refer to the troubleshooting section of the manual for assistance with any issues. Always prioritize safety during the entire process.

Connecting Gas Lines and Venting

Connecting the gas lines and venting system to your AO Smith BTHS-750A is crucial for safe and efficient operation. Before commencing, ensure the gas supply is turned off. Use a gas-rated sealant on all connections to prevent leaks. Carefully connect the gas supply line to the water heater’s gas inlet, ensuring a tight and secure connection. After connecting the gas line, use a leak detection solution to check for any gas leaks. If a leak is detected, immediately turn off the gas supply and tighten the connections or replace any faulty parts. Never attempt to repair a gas leak yourself unless you are a qualified gas technician. The venting system is equally important. The correct venting configuration is essential for proper combustion and to prevent the buildup of harmful gases. Ensure the venting system is sized appropriately for the water heater’s BTU rating and that it meets all local codes and regulations. Install the vent pipe according to the manufacturer’s specifications, ensuring all joints are securely sealed to prevent drafts. Proper venting is vital for safe operation and compliance with safety standards. After completing the installation, inspect all connections for leaks. It is recommended to have a qualified gas technician inspect the installation before turning on the gas supply. Always prioritize safety when working with gas lines.

Electrical Connections and Wiring

Electrical connections for the AO Smith BTHS-750A must adhere strictly to local electrical codes and regulations. Before starting any electrical work, ensure the power supply is completely switched off. This is a critical safety precaution to prevent electric shock. Locate the electrical junction box provided with the water heater. The wiring should be done by a qualified electrician to ensure compliance with all safety regulations. Identify the power supply wires, and connect them securely to the corresponding terminals in the junction box, ensuring correct polarity. Use appropriate wire connectors and ensure all connections are tight and secure to avoid any potential hazards. After making the connections, carefully tuck away any excess wiring. Before powering the water heater, visually inspect all connections and wiring for any loose or damaged components. Any faulty or damaged wiring must be replaced immediately. Never operate the water heater with any loose or faulty electrical connections; After all connections have been checked, carefully replace the junction box cover and secure it properly. Then turn the power supply back on. The correct voltage and amperage should be confirmed before activating the unit. If there is any doubt, consult a qualified electrician who can verify all connections are correct and safe. Always remember that improper electrical work can result in serious injury or fire.

Water Connections and Plumbing

Connecting the water lines to your AO Smith BTHS-750A requires careful attention to detail and adherence to local plumbing codes. Before beginning, ensure the water supply is turned off. Use appropriate-sized pipe and fittings that match the water heater’s inlet and outlet connections. Apply Teflon tape or pipe sealant to the threads of all fittings to prevent leaks. Connect the cold-water inlet line to the designated inlet port on the water heater. Tighten the fittings securely, but avoid over-tightening, which could damage the connections. Next, connect the hot-water outlet line to the designated outlet port. Again, ensure a secure connection without over-tightening. Once the connections are complete, carefully check for any leaks. If leaks are detected, immediately tighten any loose fittings or replace any damaged components. After ensuring there are no leaks, slowly turn the water supply back on and monitor the connections closely for any signs of leakage. If leaks persist, consult a qualified plumber to identify and rectify the problem; Proper water connections are crucial for preventing water damage and ensuring the water heater operates efficiently and safely. Always remember to follow local plumbing codes and regulations during the installation process.

Testing and Initial Operation

After completing the installation of your AO Smith BTHS-750A water heater, a thorough testing phase is crucial to ensure proper functionality and safety. Begin by visually inspecting all connections for any signs of leaks. Carefully check the gas lines for any gas leaks using a soapy water solution. Apply the solution to all connections and observe for any bubbling, which indicates a leak. If a leak is detected, immediately turn off the gas supply and contact a qualified gas technician to repair the leak before proceeding. Next, turn on the water supply and check for any leaks around the water connections. If leaks are found, tighten any loose fittings or replace damaged components. Once you’ve confirmed the absence of gas and water leaks, turn on the power to the water heater and allow it to heat up. Monitor the temperature gauge to ensure it reaches the desired temperature setting. Once the water heater reaches the set temperature, open a hot water tap to check for hot water flow. If there’s insufficient hot water flow or the water is not heating up, review the installation steps to identify and correct any issues. If problems persist, consult the troubleshooting section of this manual or contact a qualified service technician. Remember, proper testing and initial operation are essential for the safe and efficient use of your AO Smith BTHS-750A water heater.

Troubleshooting Common Issues

This section addresses common problems encountered with the AO Smith BTHS-750A water heater. If the unit fails to ignite, verify gas supply, check the gas valve, and ensure proper electrical connections. A pilot light that won’t stay lit might indicate insufficient gas pressure or a blocked pilot orifice; consult a professional for cleaning or replacement. No hot water output suggests a faulty heating element (if electric) or a malfunctioning gas burner (if gas). Check the thermostat settings, ensuring they are correctly adjusted to your desired temperature. Examine the water inlet and outlet for blockages; sediment buildup or debris can restrict water flow. Unusual noises, like rumbling or banging, may be due to sediment accumulation or improper venting. Regular flushing to remove sediment is recommended. If the water heater is leaking, carefully inspect all connections for loose fittings or damaged seals. Address any leaks promptly to prevent further damage. For persistent issues or problems not covered here, consult the detailed troubleshooting section in the full AO Smith BTHS-750A installation manual, or contact a qualified technician for professional assistance. Remember to always prioritize safety and turn off the gas and power supply before any maintenance or troubleshooting attempts.

Maintenance and Regular Servicing

Regular maintenance is crucial for optimal performance and longevity of your AO Smith BTHS-750A water heater. Annual inspections by a qualified technician are highly recommended, particularly for safety checks of gas lines and electrical connections. Sediment buildup is a common issue; periodic flushing helps remove mineral deposits that reduce efficiency and can cause damage. Consult the manufacturer’s instructions for the proper flushing procedure. Inspect the anode rod (if applicable) for corrosion; replacement might be necessary depending on its condition. A corroded anode rod can significantly impact the lifespan of the water tank. Check for any signs of leaks around the tank, pipes, and connections. Address leaks immediately to prevent water damage. Keep the area surrounding the water heater clean and free of flammable materials. Regularly check the venting system to ensure it is clear and unobstructed; proper venting is essential for safe operation and prevents carbon monoxide buildup. Follow the manufacturer’s guidelines for appropriate water temperature settings to optimize efficiency and avoid scalding. Keep a record of maintenance performed, including dates and any repairs or replacements made. This log will help in tracking the overall health of your water heater and assist in future troubleshooting.

Warranty Information and Contact Details

Your AO Smith BTHS-750A water heater comes with a manufacturer’s warranty; details are outlined in the separate warranty document included with your purchase. This warranty covers defects in materials and workmanship under normal use and service conditions. Thoroughly review the warranty document to understand the coverage specifics, duration, and any limitations. To register your product and activate the warranty, visit the AO Smith website or contact their customer service department. Retain your proof of purchase, including the model number and serial number of your water heater, for warranty claims. If you experience issues during the warranty period, contact AO Smith customer support immediately. They can provide guidance, troubleshoot potential problems, and arrange for repairs or replacements if necessary. For faster service, have your model and serial numbers ready, along with details of the issue. AO Smith’s contact information can typically be found on their website, warranty documentation, or the product packaging. Keep this information readily accessible for future reference. Remember, proper installation and maintenance are crucial for maintaining warranty coverage. Any damage caused by improper installation or neglect may void the warranty.

coin collecting cheat sheet pdf

Coin Collecting Cheat Sheet PDF⁚ A Comprehensive Guide

This comprehensive guide provides a detailed overview of coin collecting‚ covering various aspects like types of checklists‚ coin collecting terms‚ error cheat sheets‚ and valuable resources. This guide aims to equip you with the knowledge and tools necessary to embark on a successful coin collecting journey.

Introduction

Coin collecting‚ also known as numismatics‚ is a captivating hobby that involves the collection and study of coins. The allure of coin collecting lies in the historical significance‚ artistic beauty‚ and potential financial value that coins hold. This guide aims to be your comprehensive resource‚ offering a “cheat sheet” to navigate the world of coin collecting.

From identifying key dates and mint marks to understanding coin errors and grading systems‚ this guide covers essential aspects of coin collecting. It will provide you with the foundational knowledge to confidently embark on your numismatic journey. Whether you’re a seasoned collector or a curious beginner‚ this cheat sheet will serve as your trusted companion‚ helping you make informed decisions and build a valuable and rewarding collection;

The guide will delve into various aspects of coin collecting‚ including exploring different types of coin checklists‚ understanding coin collecting terms‚ uncovering coin errors‚ and discovering valuable resources. By the end of this guide‚ you’ll have a solid understanding of the fundamentals of coin collecting and be well-equipped to navigate the exciting world of numismatics.

Types of Coin Checklists

Coin checklists serve as indispensable tools for collectors‚ providing a comprehensive list of coins to track their progress and ensure completeness. These checklists‚ often available in PDF format‚ can be tailored to specific series‚ denominations‚ or themes‚ catering to diverse collecting interests. Let’s explore the various types of coin checklists available⁚

Series-Specific Checklists⁚ These checklists focus on a particular series of coins‚ such as Lincoln Cents‚ Washington Quarters‚ or Morgan Silver Dollars. They list all the dates and mint marks within that series‚ allowing collectors to keep track of the coins they own and those they still need.

Denomination Checklists⁚ These checklists cover all the coins issued in a specific denomination‚ such as half-dollars‚ dimes‚ or nickels. They can be helpful for collectors who are interested in assembling a complete collection of a particular denomination‚ regardless of the series.

Thematic Checklists⁚ These checklists focus on coins related to a specific theme‚ such as state quarters‚ commemorative coins‚ or coins with specific error varieties. They offer a targeted approach for collectors who are passionate about a particular subject.

Lincoln Cent Checklists

Lincoln Cents‚ the most widely circulated U.S. coin‚ hold a special place in the hearts of many collectors. Their accessibility and historical significance make them an ideal starting point for numismatists of all levels. Lincoln Cent checklists are essential resources for tracking your collection‚ ensuring that you have all the key dates and mint marks. These checklists can be found in various formats‚ including⁚

Basic Checklists⁚ These checklists offer a straightforward list of dates and mint marks for Lincoln Cents‚ providing a basic framework for your collection. They are a great starting point for beginners or those seeking a simple overview.

Standard Checklists⁚ These checklists expand upon the basic version‚ often including additional information such as coin varieties‚ key dates‚ and pricing guides. They provide a more comprehensive approach for collectors interested in exploring the nuances of Lincoln Cent collecting.

Specialized Checklists⁚ Some checklists focus on specific aspects of Lincoln Cent collecting‚ such as doubled die varieties‚ rare mint marks‚ or specific years of production. These specialized checklists cater to collectors with niche interests and can be invaluable for identifying valuable and unique coins.

Coin Collecting Terms

Navigating the world of coin collecting can be overwhelming‚ especially for beginners. A vast array of terms and jargon is often used‚ making it challenging to understand the nuances of the hobby. This cheat sheet provides a glossary of essential coin collecting terms to help you decipher the language of numismatics⁚

Numismatics⁚ The study and collection of coins‚ medals‚ and paper money. It encompasses the history‚ design‚ production‚ and value of these items.

Coin Variety⁚ A variation in the design‚ die‚ or production of a coin‚ making it unique from other coins of the same date and mint mark. These can significantly impact a coin’s value.

Key Date⁚ A coin with a particular date that is relatively rare or valuable due to its limited mintage‚ historical significance‚ or desirable condition. These are highly sought after by collectors.

Mint Mark⁚ A letter or symbol stamped on a coin to indicate the location where it was minted. Mint marks help collectors identify the origin of a coin.

Proof Coin⁚ A coin struck with highly polished dies and blanks‚ resulting in a mirror-like finish. Proof coins are typically produced for collectors and are often highly valued.

Circulated Coin⁚ A coin that has been used in commerce and shows signs of wear and tear from handling. Circulated coins are typically less valuable than uncirculated coins.

Uncirculated Coin⁚ A coin that has never been used in commerce and shows no signs of wear. Uncirculated coins are often more valuable than circulated coins.

Grading⁚ The process of evaluating the condition of a coin based on its wear‚ surface quality‚ and overall appearance. Grading systems are used to determine a coin’s value and desirability.

Coin Error Cheat Sheet

Coin errors are fascinating anomalies that occur during the minting process‚ resulting in unique and often valuable coins. These errors can range from minor imperfections to significant deviations‚ making them highly sought after by collectors. This cheat sheet provides a quick guide to common coin errors⁚

Off-Center Strike⁚ Occurs when the planchet (the metal blank) is not fully positioned within the coin press‚ resulting in a portion of the design being cut off or missing.

Double Strike⁚ Happens when the planchet is struck twice by the die‚ creating a double image of the design. This can result in a “doubled” appearance of letters‚ numbers‚ or images.

Die Crack⁚ A crack or break in the die used to strike the coin‚ resulting in a line or indentation on the coin’s surface.

Die Cuds⁚ Small pieces of metal that break off from the die and become embedded in the coin’s surface‚ creating a raised bump or depression.

Brokage⁚ Occurs when a partially struck planchet is accidentally placed back into the press and struck again‚ resulting in the “ghost” image of the previously struck design on the coin.

Lamination⁚ A defect in the metal planchet‚ resulting in a thin layer of metal that separates from the rest of the coin‚ creating a visible line or layer.

Rotation Error⁚ Happens when the planchet rotates slightly during the striking process‚ resulting in a misaligned design‚ such as a rotated date or image.

Mutilated Coin⁚ A coin that has been damaged or altered after being minted‚ such as by drilling‚ scratching‚ or bending.

Coin Collecting Resources

Navigating the world of coin collecting can be both exciting and overwhelming. Fortunately‚ numerous resources are available to help you enhance your knowledge and expand your collection. Here’s a guide to some valuable resources⁚

Coin Clubs⁚ Joining a local or online coin club provides a community of fellow enthusiasts‚ offering guidance‚ information sharing‚ and opportunities to buy‚ sell‚ and trade coins. These clubs often host meetings‚ shows‚ and educational events.

Coin Shows and Auctions⁚ Attending coin shows and auctions allows you to see a vast array of coins‚ meet dealers‚ and potentially find rare or valuable pieces. Online auction platforms also offer a convenient way to buy and sell coins.

Coin Dealers⁚ Trusted coin dealers can provide expert advice on grading‚ pricing‚ and authenticity. Look for dealers who are members of reputable organizations‚ such as the American Numismatic Association (ANA).

Coin Grading Services⁚ Professional grading services‚ such as the Professional Coin Grading Service (PCGS) and Numismatic Guaranty Corporation (NGC)‚ provide authentication and grading for coins‚ ensuring their legitimacy and value.

Coin Books and Price Guides⁚ Numerous books and price guides offer detailed information on coin history‚ identification‚ and pricing. These resources can help you research coins‚ understand their values‚ and make informed collecting decisions.

Online Resources⁚ Websites and online forums dedicated to coin collecting offer a wealth of information‚ including articles‚ discussions‚ and resources. These platforms can connect you with experts and other collectors.

By utilizing these resources‚ you can enhance your coin collecting journey‚ gain valuable knowledge‚ and build a successful and rewarding collection.

Coin Collecting Merit Badge

The Coin Collecting Merit Badge‚ offered by the Boy Scouts of America‚ provides a structured and engaging way for young scouts to delve into the fascinating world of numismatics. This badge encourages scouts to explore the history‚ identification‚ and value of coins‚ fostering a deeper understanding and appreciation for this hobby.

To earn this merit badge‚ scouts must complete a series of requirements‚ including⁚

  • Learning about the history of coinage in the United States.
  • Identifying different types of U.S. coins‚ including their dates‚ mint marks‚ and denominations.
  • Understanding the basics of coin grading and condition.
  • Creating a coin collection and documenting their acquisitions.
  • Learning about coin collecting resources and organizations.

The Coin Collecting Merit Badge not only provides valuable knowledge but also instills in scouts the importance of organization‚ research‚ and appreciation for history. By completing the badge requirements‚ scouts develop a foundational understanding of coin collecting‚ setting the stage for a lifelong passion for this fascinating hobby.

For more information and detailed requirements‚ refer to the official Boy Scouts of America Merit Badge Hub. This resource provides comprehensive guidance and support for scouts pursuing this merit badge.

Coin Collecting for Beginners

Embarking on a coin collecting journey can be an exciting and rewarding experience‚ but it can also feel overwhelming for beginners. Fear not‚ as starting your coin collecting adventure is easier than you might think. A few simple steps will set you on the right path to becoming a successful numismatist.

First‚ choose a specific area of interest. Do you want to collect U.S. coins‚ foreign coins‚ or perhaps focus on a specific historical period or coin type? This will help you narrow down your collection and make it more manageable. Second‚ find resources to aid your journey. There are numerous books‚ websites‚ and even coin clubs dedicated to helping you learn about coins and their value.

Don’t be afraid to ask questions. Join online forums or connect with experienced collectors to get advice and learn from their experience. Start small and gradually build your collection. There’s no need to rush into expensive coins right away. Focus on finding affordable pieces that pique your interest and gradually expand your collection as you gain more knowledge and experience.

Remember‚ coin collecting is about more than just financial gain. It’s a journey of discovery‚ learning‚ and appreciation for history. So‚ relax‚ have fun‚ and enjoy the exciting world of coin collecting!

Coin Collecting Auction Houses

For serious coin collectors seeking rare and valuable coins‚ auction houses are a crucial part of the journey. These specialized marketplaces offer a wide variety of coins‚ from common to extremely rare‚ attracting both seasoned collectors and those just starting out. Auction houses provide a platform for buying and selling coins at competitive prices‚ often exceeding the value found in traditional coin shops.

Before venturing into coin auctions‚ it’s essential to research reputable auction houses. Some of the most respected names in the industry include Heritage Galleries and Stacks Bowers Galleries. These auction houses boast extensive experience‚ a strong reputation‚ and a commitment to fair and transparent transactions. Before attending an auction‚ it’s wise to familiarize yourself with the process‚ understand the auction terminology‚ and set a budget for your bids.

Attending a live auction can be an exhilarating experience‚ allowing you to witness the excitement and competitive bidding firsthand. However‚ online auctions offer greater convenience and accessibility‚ allowing collectors to participate from anywhere in the world. Regardless of your chosen method‚ be sure to carefully inspect the coins before bidding‚ understand the condition grading system‚ and be prepared to pay a buyer’s premium in addition to the winning bid.

Coin Collecting Tips

Coin collecting‚ like any hobby‚ can be both rewarding and challenging. To make the most of your journey‚ it’s beneficial to follow some key tips that can enhance your experience and help you build a valuable collection. Start by focusing on a specific area of interest‚ whether it’s a particular coin series‚ a historical period‚ or a specific mint mark. This will help you stay organized and ensure you’re acquiring coins that align with your collecting goals.

Don’t neglect the importance of proper storage and handling. Coins should be kept in protective holders or albums to prevent damage from scratches‚ dents‚ or fingerprints. Regular cleaning is also crucial‚ but avoid harsh chemicals or abrasive materials. When handling coins‚ always wash your hands thoroughly to prevent oil and dirt transfer.

As you delve deeper into coin collecting‚ consider joining a coin club or attending local coin shows. These events offer opportunities to connect with fellow collectors‚ learn from experienced numismatists‚ and discover new coins to add to your collection. Remember that patience is key. Building a valuable collection takes time‚ effort‚ and a keen eye for identifying rare and valuable coins. Enjoy the journey‚ learn as you go‚ and embrace the excitement of uncovering hidden treasures in the world of coin collecting.

Posted in PDF